Modules
Folders, search, organization
Once you have files in the Files tab on a property, the next questions are organizational: where do they go, how do you find them again, and how do you act on many at once? This page covers folder creation and containment, the selection bar (Rename, Move, Download, Share, Archive), and the search bar.
For the broader overview of the Files tab, see D-01 - Files & Models module overview. This piece focuses on the organize-and-find half of the Files workflow.
Creating folders and nesting
Folders inside a property's Files tab live as rows in the same single-pane list as the files. A folder can contain other folders (containment is how nesting works here, not a separate tree). To organize files, you create folders at the current breadcrumb location, drill into them by clicking their row, and navigate back up via the breadcrumb.
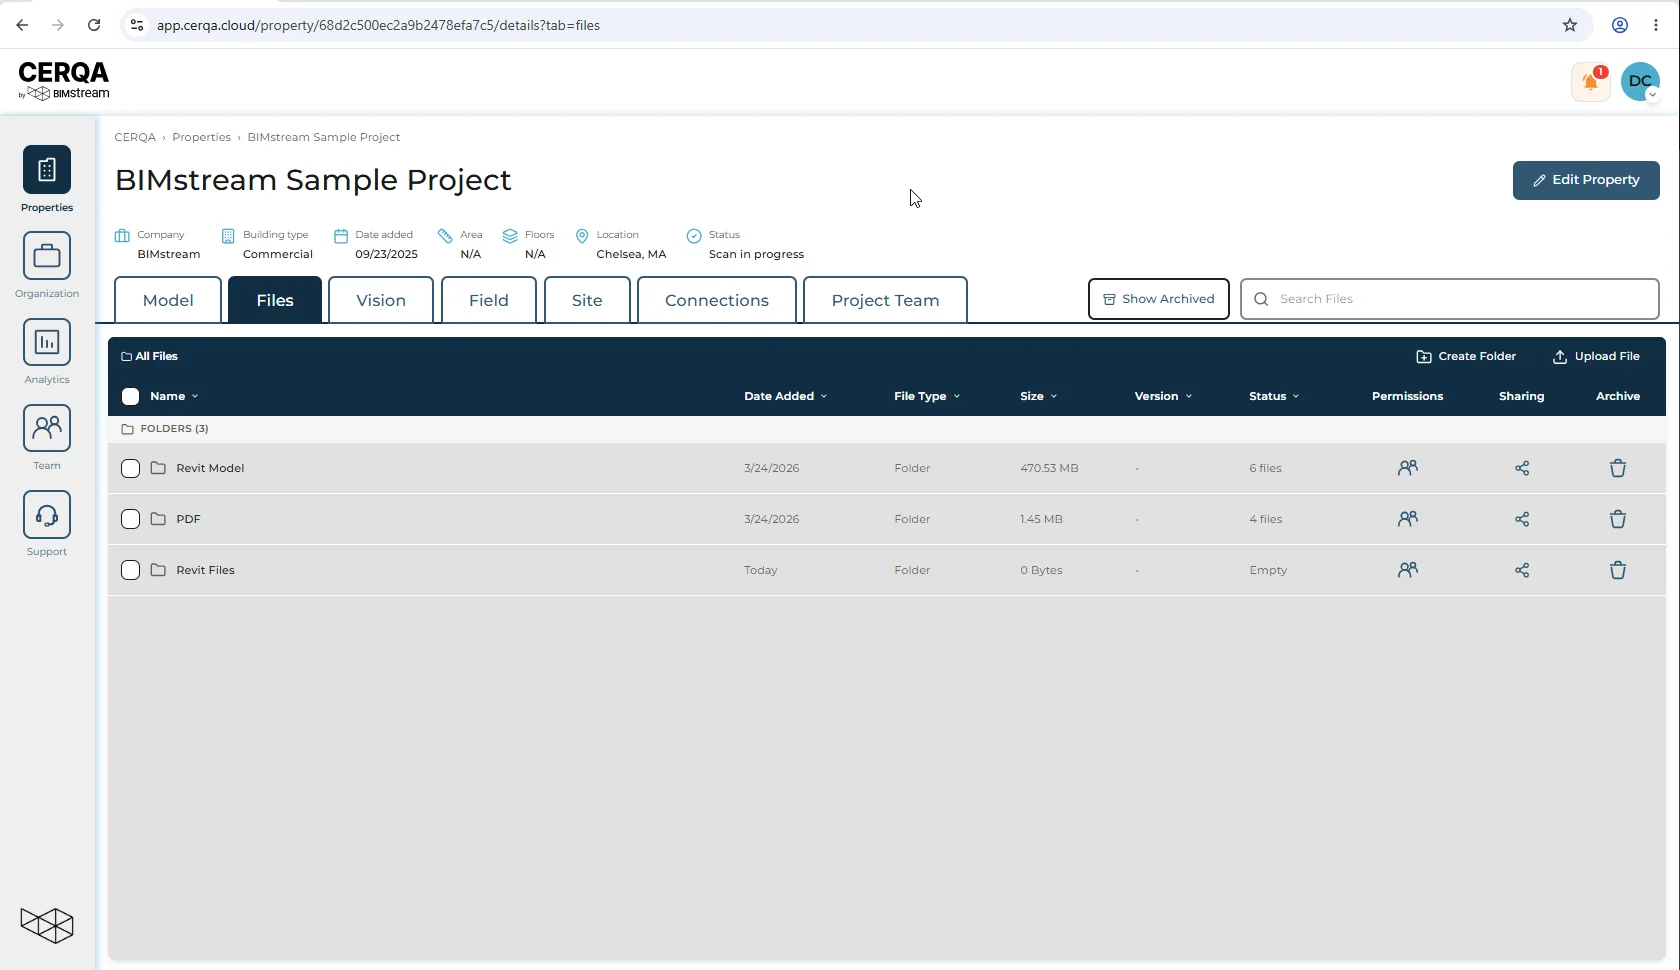
To create a folder, click Create Folder in the top-right of the list header. The Create New Folder modal opens with a folder-name input and helper text. Type a name and click Create Folder to confirm. The new folder appears in the list at your current breadcrumb location; to create a folder inside an existing folder, drill into that folder first (click its row), then click Create Folder from there.
No right-click, no drag-to-nest
Folder operations run through the Create Folder button + modal and the selection bar. There is no right-click context menu for folder operations, and there is no drag-and-drop for nesting or moving files or folders. Nesting is done by drilling into the target folder first, then creating or uploading inside it; moving is done via the selection bar (see the next section).
Moving files
To move a file, or a batch of files, use the selection bar. Select the files with their checkboxes, and a horizontal action bar appears with five actions: Rename, Move, Download, Share, Archive. Move opens a folder-picker modal.
- 1Select the files - Click a row's checkbox on the left. To select a range, click the first row's checkbox, then shift-click the last. Once at least one file is checked, the selection bar appears above the file list.
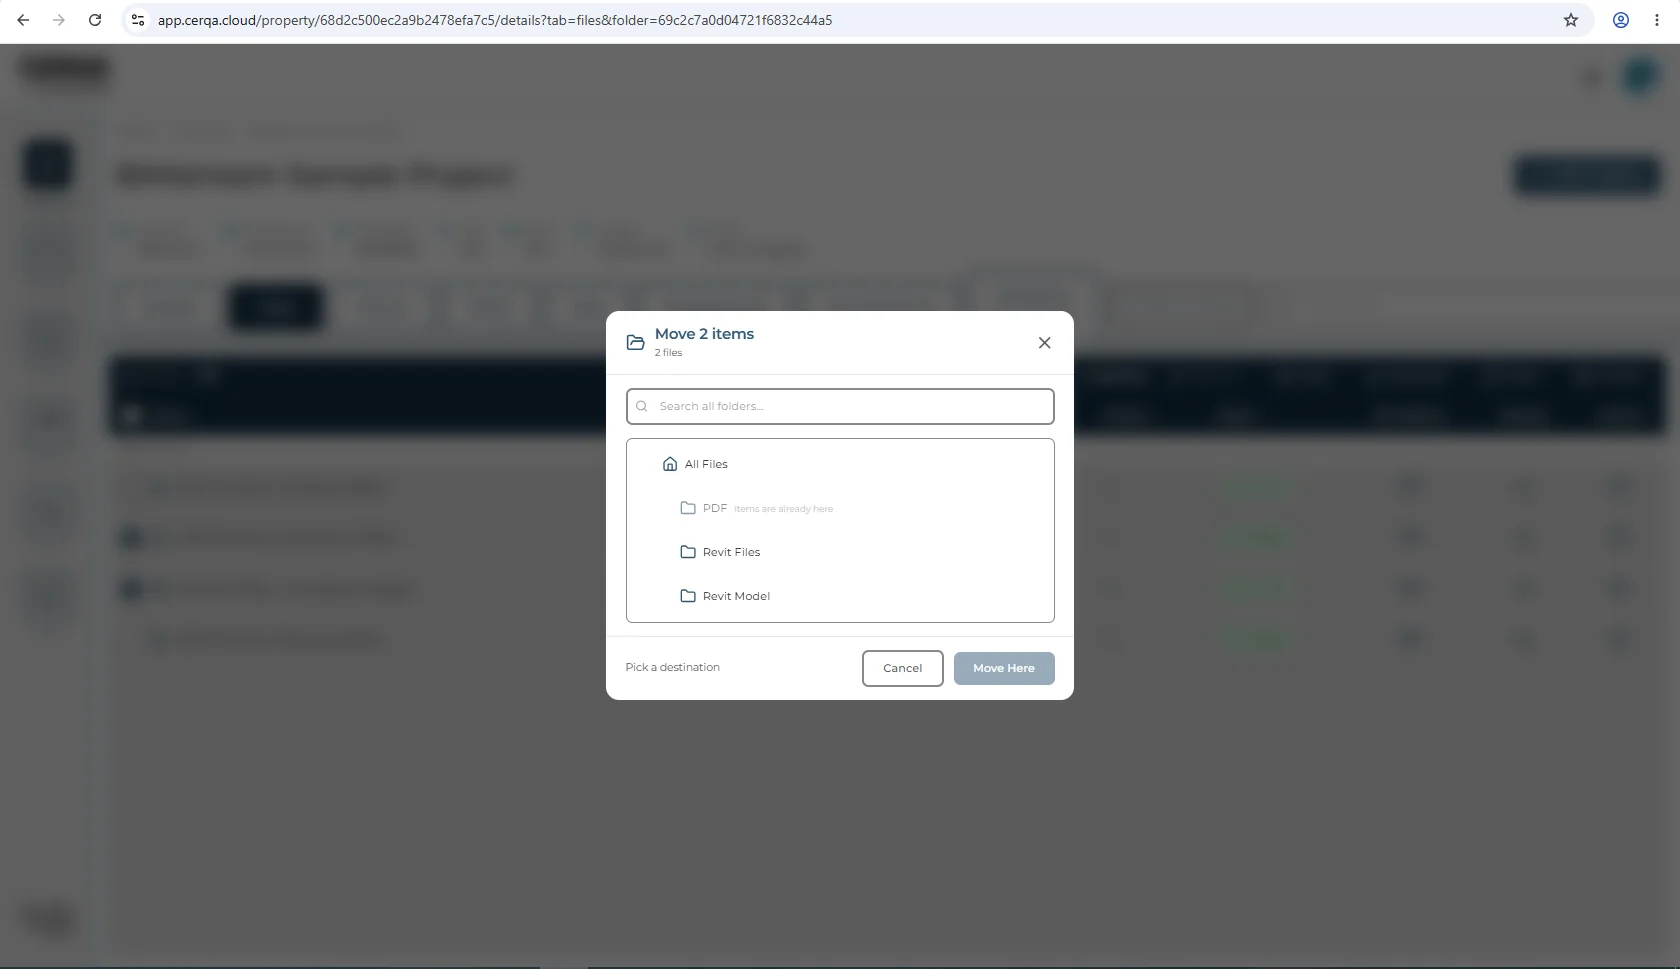
- 2Click Move - Move sits in the selection bar. Hovering it shows the tooltip Move to another folder. Click it and the move modal opens, titled for the number of files you selected (“Move 3 items” for three).
- 3Pick the target folder in the modal - The modal is a single pane: a Search all folders box at the top and a folder list beneath it, with the root (All Files) at the top and its folders indented under it. Click a folder row to select it as the destination, or search for one by name. The folder your selection already sits in is greyed and labeled Items are already here, so you cannot move files into the folder they came from. Move Here stays disabled until you pick a destination
- 4Confirm the move - Navigate to the target folder in the modal, then click Move Here in the modal footer to confirm.
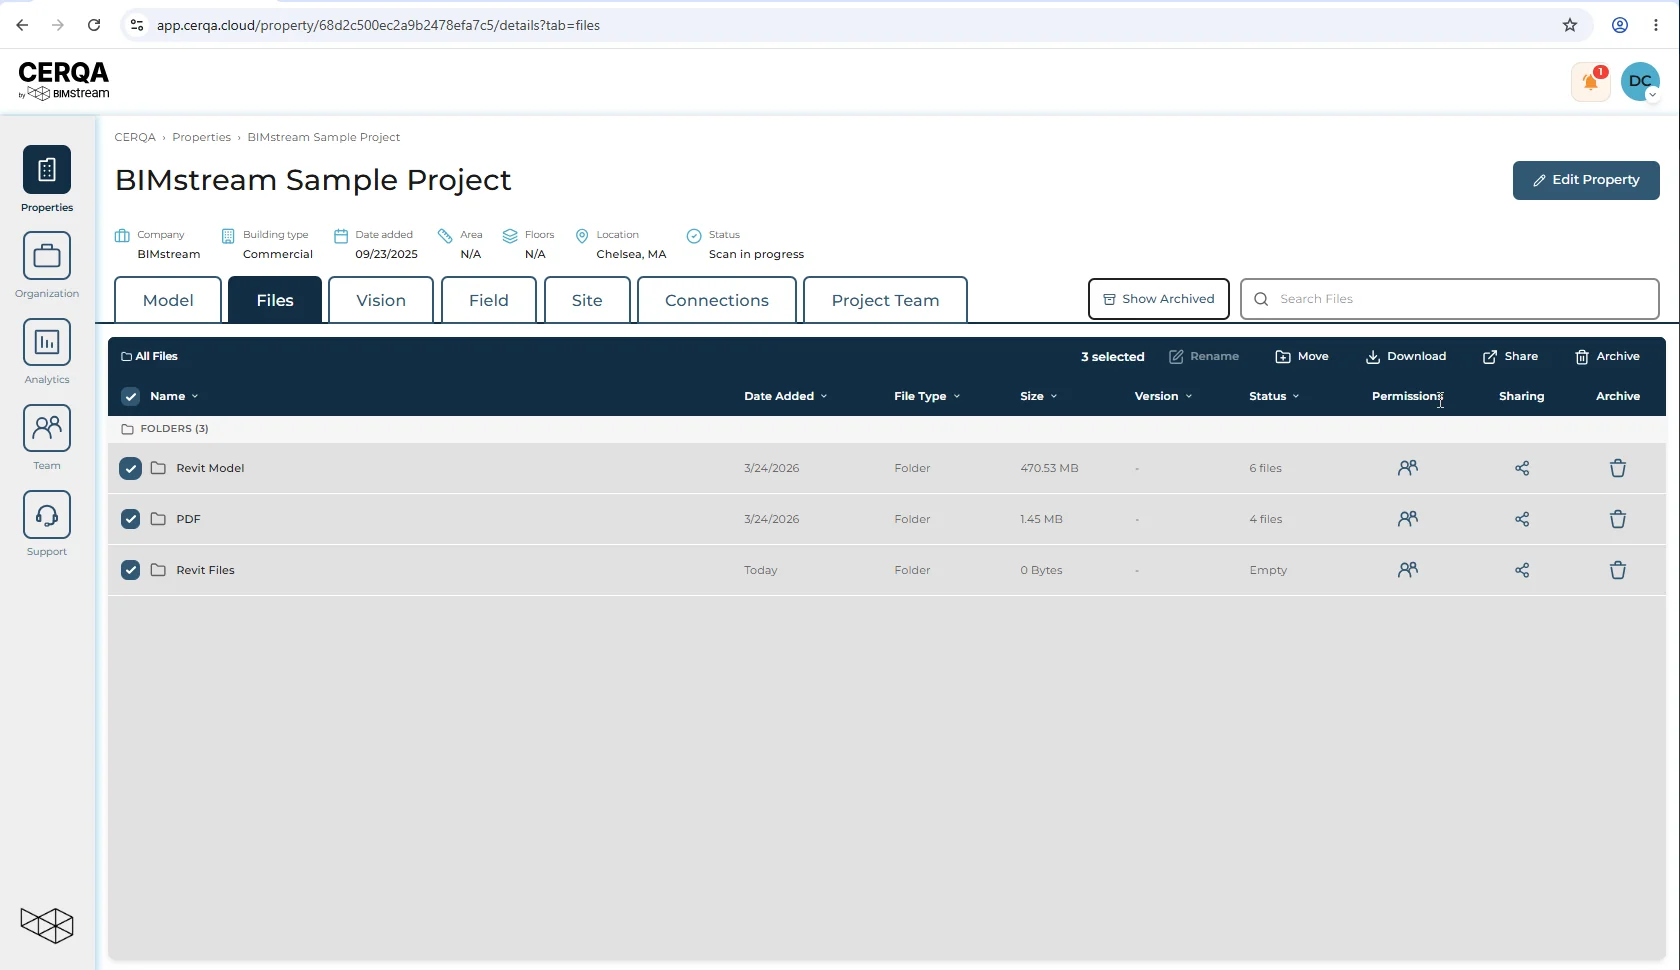
The bar also carries three more actions that work on the whole selection:
- 1Download - Bundle the selection for download. Handy when you need a copy of several files at once outside CERQA.
- 2Share - Opens the share dialog against the whole selection. Same dialog as the single-file share; see D-02 - Sharing & external links.
- 3Archive - Move the selection out of the default file list view. Archived files remain on the property and can be restored via the Show Archived toggle at the top of the Files tab.
Rename takes one file at a time
Rename sits in the bar with the others, but it is the one action that needs a single selection. Tick two or more rows and Rename greys out while Move, Download, Share and Archive stay available.
Action visibility varies by role
The full five-action set shown here is what a Company Admin sees. Lower-role members may see fewer actions depending on their permissions.
Search inside Files
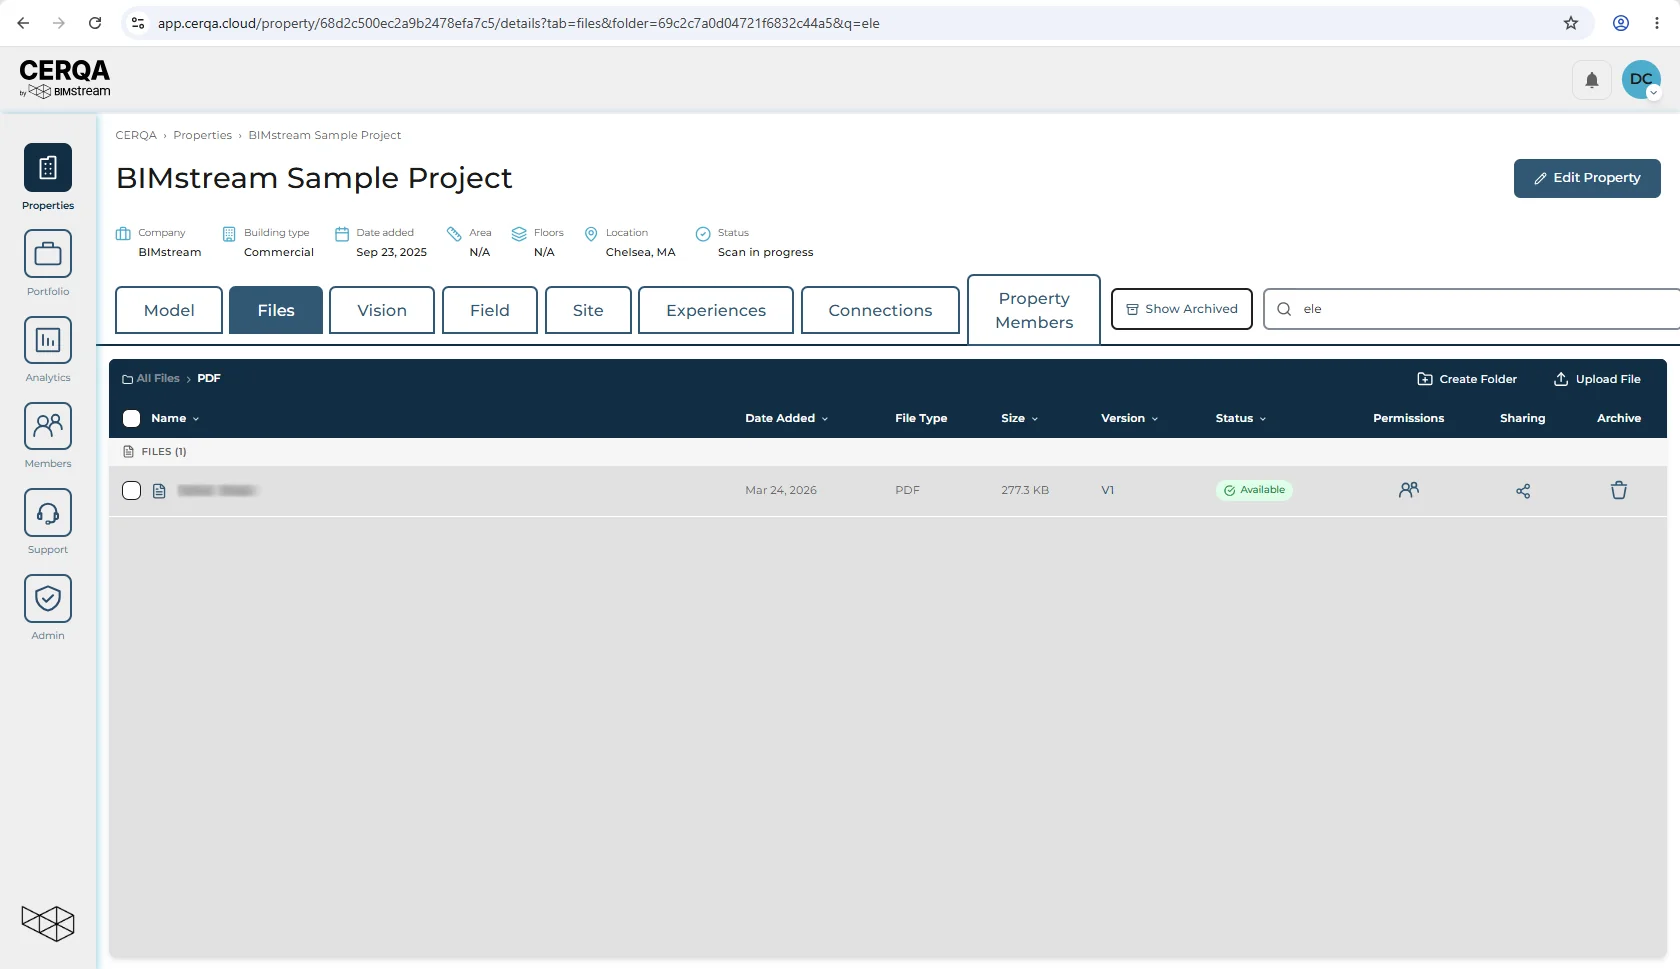
The search bar at the top of the Files tab is a simple file search: type a file name (or part of one) and the list narrows to matching files. Search is scoped to the property you're in; it does not span properties.
Related pieces
- D-01 - Files & Models module overview - the broader walkthrough of the Files tab: where it lives, the single-pane file list with breadcrumb navigation, and which actions are gated to Project Manager and above.
- D-02 - Sharing & external links - the share dialog the bulk-share action opens.
- PM-03 - Uploading and organizing files - the PM-facing flow that pairs uploads with the organize-and-find work covered here.