Project Manager
Uploading and organizing files
Uploading and organizing files is the Project Manager's most-used flow on a property. Upload a few drawings through the Upload dialog, sort them into folders, rename what needs renaming, share what needs sharing. This page is the PM-specific walkthrough of that loop. For the broader Files & Models module reference (where Files lives, the single-pane file list with breadcrumb navigation, role-gated actions), see D-01 - Files & Models module overview; for the deeper folders-and-search mechanics, see D-04 - Folders, search, organization.
Opening the Files tab in the Files & Models module
From a property workspace, click the Files tab in the tab bar. The single-pane file list opens with a breadcrumb at the top (the root reads All Files). Folders and files appear as rows in the same pane; click a folder row to drill in. The Files tab is the property-level surface of the Files & Models module, the same module that backs the Model tab's 3D BIM viewer for Revit files (more on the dual-surface behavior below).
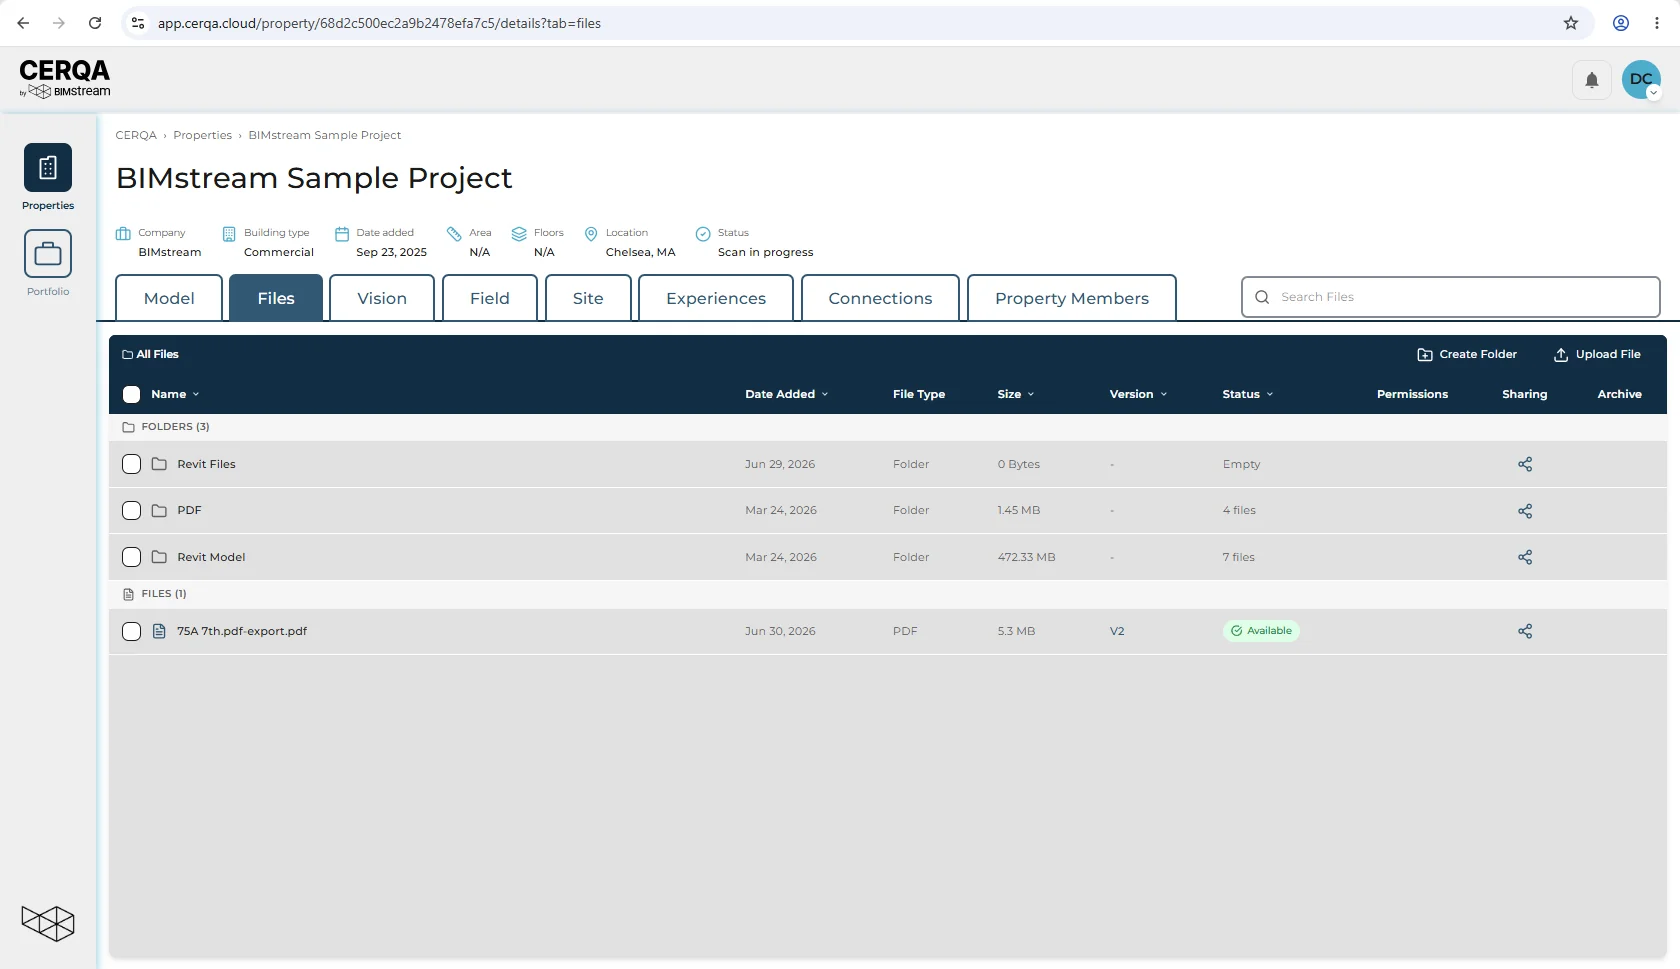
The Files tab appears for every property member whose company subscribes to the Files & Models module - it is the most-used module surface in CERQA. For the subscription-to-tab map, see CA-07 - Module gating reference.
Uploading - the Upload dialog
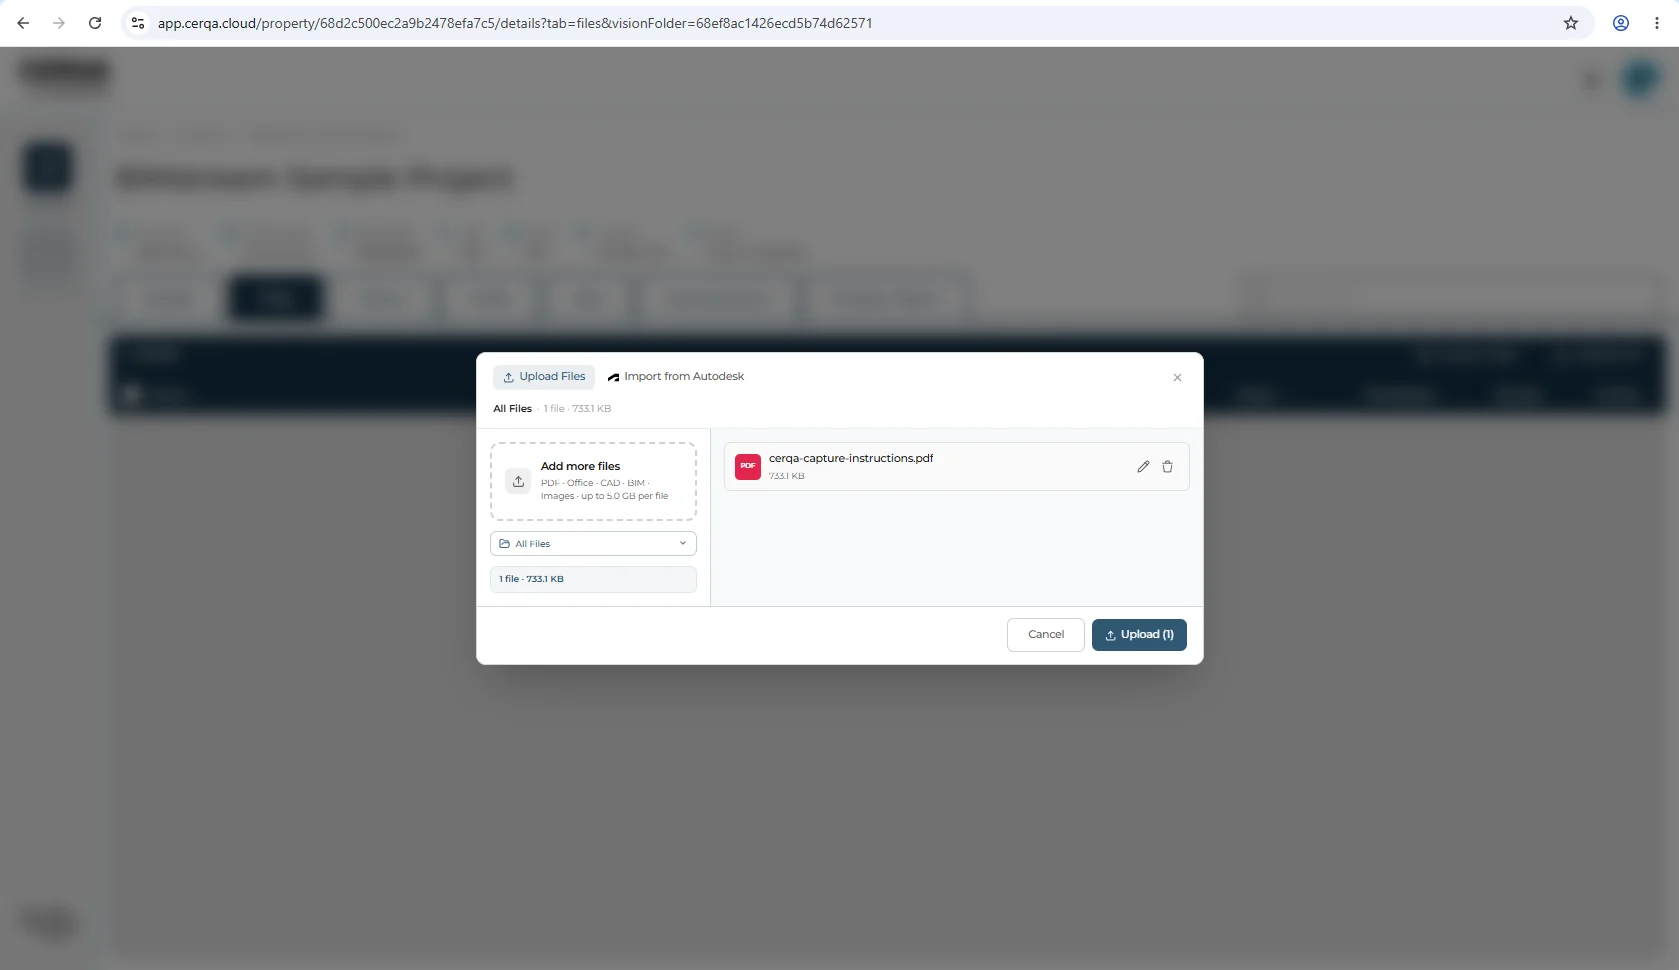
Uploading files into the Files tab goes through the Upload dialog: click Upload in the Files-tab actions, pick files from the file picker, pick the destination folder, confirm.
- 1Open the Upload dialog and pick files - Click the Upload button in the Files tab actions to open the dialog. Pick files from the file picker; pick a destination folder from the dropdown (defaults to the currently-selected folder); confirm to start upload.
Accepted file types and the 5 GB per-file limit
The Files tab accepts these categories:
- PDFs - drawings, specs, reports. PDFs are the markup-target format (see D-03).
- Office documents.
- CAD files - DWG and similar formats.
- BIM models - Revit (
.rvt), IFC (.ifc), and related BIM formats. - Images - PNG, JPG, and other common photo formats.
- Video - MP4 and similar.
The Files tab does not accept point clouds. If you have a scan file (.e57 or another point-cloud format), it uploads on the Vision tab, not here, and it feeds Vision's floor-plan generation. See FL-04 - Floor plans in Vision and in Field.
The upload dialog's summary line names fewer of these than it accepts, so a format it does not mention is not necessarily rejected.
5 GB per-file upload limit
The upload dialog enforces a 5 GB per-file limit. Files larger than 5 GB are rejected at the upload step. For very large files (a multi-GB BIM model, a high-res video), split into smaller files or escalate via CA-14 - When to call your CERQA Account Manager if a larger limit is needed for your account.
Revit files dual-surface with the Model tab
When you upload a Revit .rvt file via the Files tab, it surfaces on both the Files tab AND the Model tab on the same property once the model finishes processing. Same underlying file, two presentation surfaces: Files for sharing and markup, Model for 3D viewing. The module name Files & Models reflects this dual nature. For the Model side, see M-01 - 3D Model Viewer overview.
CERQA-ready file preparation - check with your CERQA Account Manager
Some client file sets need preparation work before they ingest cleanly into CERQA: folder restructuring, format conversion, metadata mapping. Whether your team needs CERQA Support's help for that prep is project-specific.
The path is your CERQA Account Manager via CA-14 - When to call your CERQA Account Manager.
Organizing into folders - create, move via the selection bar, nest
Folders and files live as rows in the same single-pane list. Three operations cover most of the day-to-day organize loop:
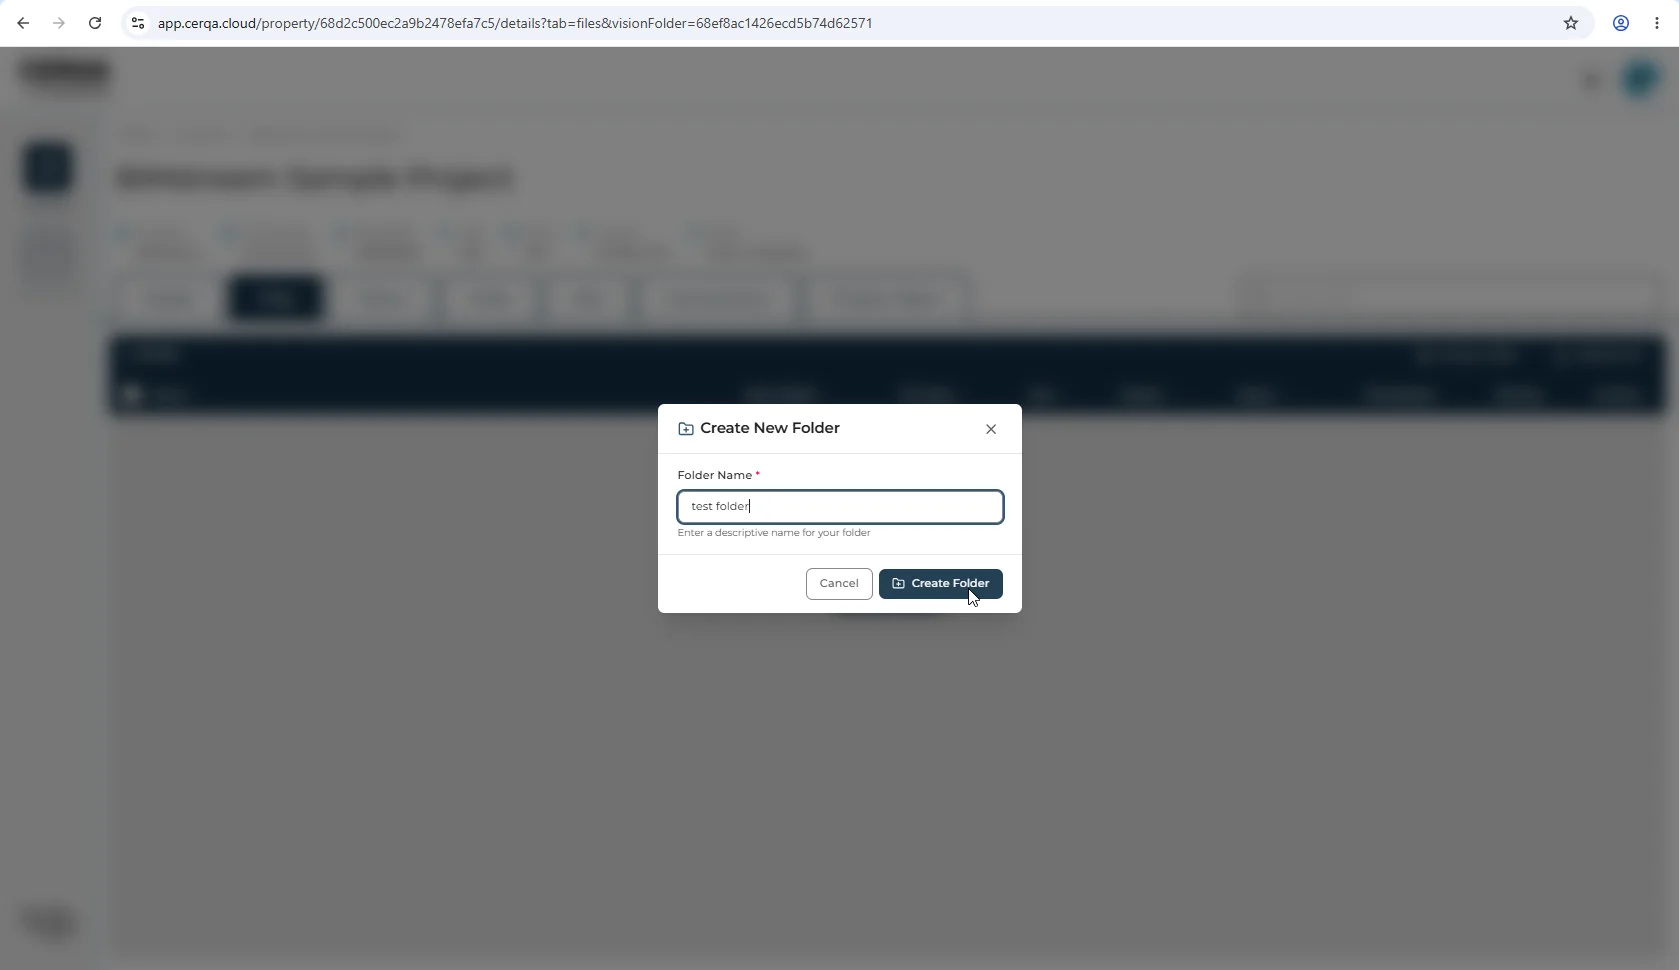
- 1Create a folder - Click Create Folder in the top-right of the file list header. The Create New Folder modal opens with a folder-name input and helper text; type the name, click Create Folder in the modal footer to confirm. The new folder appears in the list at your current breadcrumb location.
- 2Move files between folders - Select one or more files with their checkboxes, and the selection bar appears above the file list. Click Move (tooltip: Move to another folder) and the move modal opens, titled for the number of files you selected (“Move 3 items” for three), a single pane with a folder search box and the folder list beneath it. Pick the destination folder, click Move Here. Full walkthrough in D-04 - Folders, search, organization.
- 3Nest folders - Folders can contain other folders to any depth. To create a folder inside an existing folder, drill into that folder first (click its row in the file list), then click Create Folder from that breadcrumb location. To reparent an existing folder, use the Move action in the selection bar. Deep nesting can make navigation slower; keep the structure shallow when practical.
For the deeper folder-and-search mechanics (file search, bulk operations via the selection bar), see D-04 - Folders, search, organization.
Renaming a file
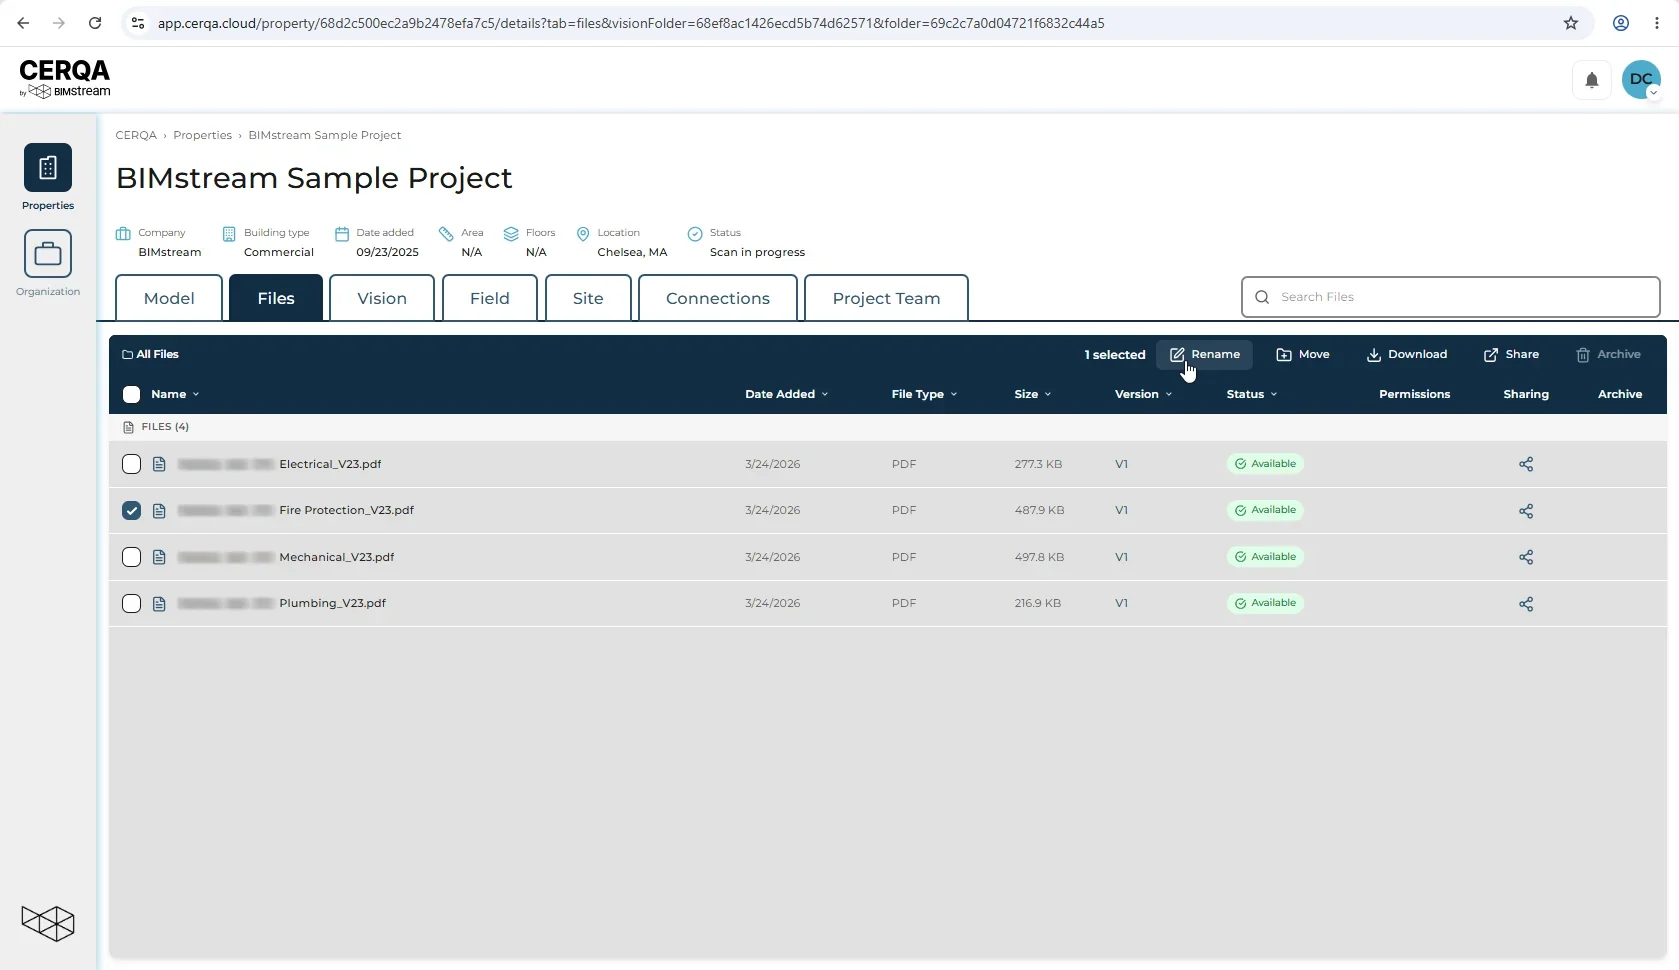
Actions on a file live in the selection bar, not in a per-row menu. Tick a file row's checkbox and the list header switches to that bar.
- 1Rename - Tick the checkbox on the file's row, then click Rename in the selection bar. The file name becomes an inline input; type the new name; press Enter to confirm. The rename is immediate; teammates who had the file open will see the new name on their next refresh.
- 2Rename takes one file at a time - Rename is the one action in the bar that needs a single selection. Tick two or more rows and it greys out while Move, Download, Share and Archive stay available.
Sharing a file - quick handoff to D-02
Share reaches the same dialog from two places: the Sharing column on the file's own row, and Share in the selection bar once you tick one or more rows. Either way you get the Share dialog: pick recipients, set Link Expires (7 / 30 / 60 / 90 days), add optional notes, send. As a Project Manager, you can generate file-share links. The Share action itself is open to Contributor and above, following the same edit permission as markup; what a given share can reach depends on where the file sits and who the recipient is.
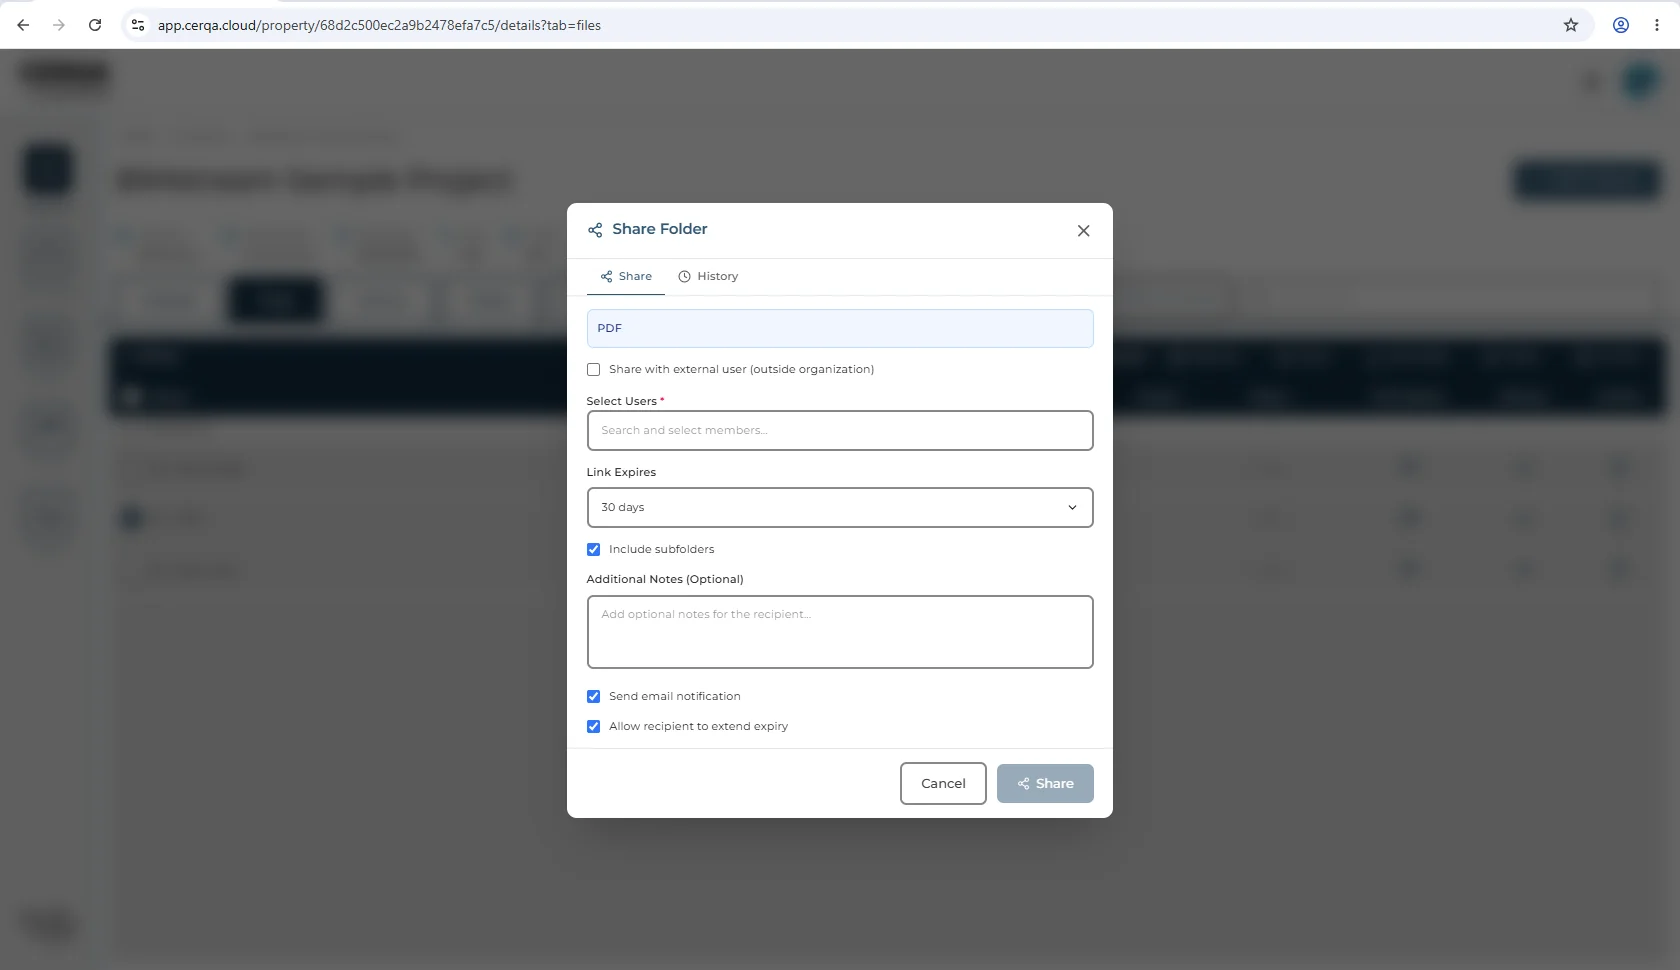
For the full Share-dialog walkthrough (every field, History tab, revoking active links), see D-02 - Sharing & external links.
Related pieces
- D-01 - Files & Models module overview - the broader module reference: where Files lives, the single-pane file list with breadcrumb navigation, role-gated actions, Revit dual-surface explained in depth.
- D-02 - Sharing & external links - the full Share dialog reference: every field, History tab, revoking active links.
- D-04 - Folders, search, organization - the deeper folders-and-search mechanics: search, bulk operations via the selection bar (Move, Download, Share, Archive, Delete).
- M-01 - 3D Model Viewer overview - the Model tab side of the Files & Models module. Where Revit
.rvtfiles dual-surface for 3D viewing. - M-04 - Importing from Autodesk - the alternative path: pulling models directly from your Autodesk Construction Cloud account instead of uploading via the Files tab.
- F-04 - Roles and permissions - the complete role matrix. File-link share is CA/PA/PM; markup is Contributor and above (Viewer opens files read-only, cannot annotate).