Company Admin
Uploading aerial models
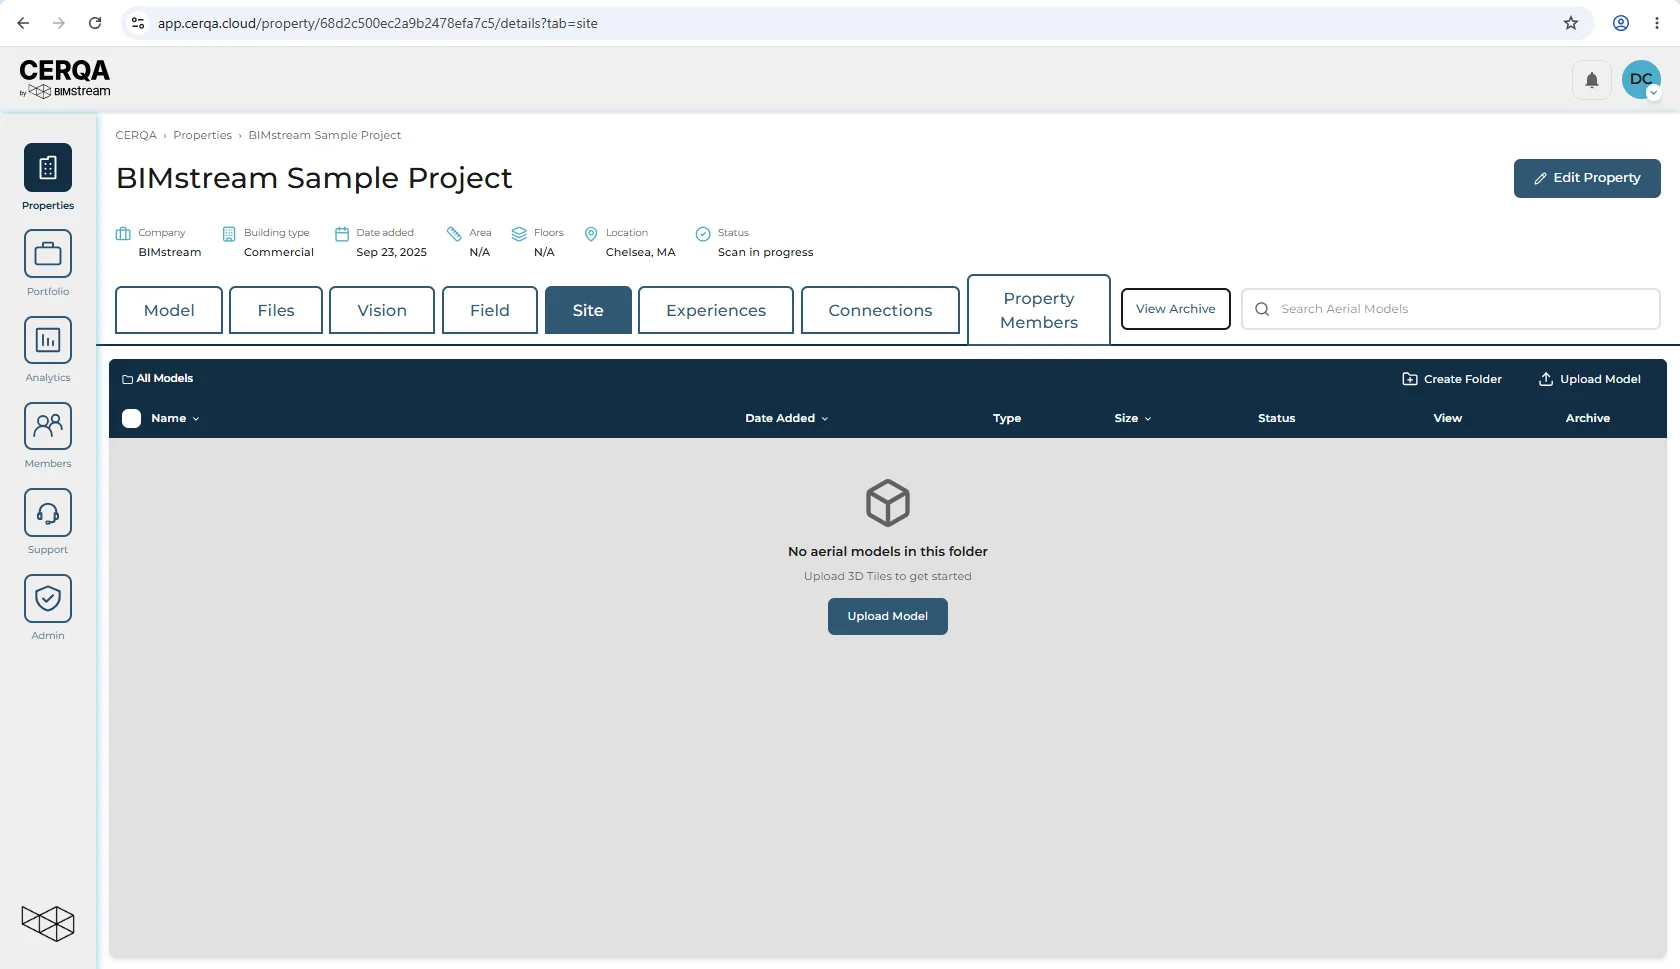
Aerial / drone-derived 3D content lives on the Site tab of a property. The Upload Aerial Model dialog accepts two distinct inputs: already-processed 3D Tiles exports from tools like Context Capture or iTwin Capture Modeler, or raw drone images that CERQA can process for you. This page walks through both paths and the dialog's settings. What processing returns depends on the job that completed.
Two different aerial upload flows, on two different tabs
They live on different tabs, take different inputs, produce different outputs, and serve different jobs. This page covers the first. Only the second is a DroneDeploy integration.
- This page (Site tab): “Upload Aerial Model”. Not a DroneDeploy integration - it accepts 3D Tiles (Context Capture, iTwin Capture Modeler or Metashape Pro exports) or Raw Images, which CERQA can process for you. What that returns depends on the completed job.
- Separate page (Field tab): “Import DroneDeploy”. Ingests a DroneDeploy ZIP export and lands floor plans plus panoramas in the Field tab. Covered in WR-05 - Drone survey to 3D model.
The same drone hardware can produce output for either path depending on the export format you choose. Pick by what you want the data to become: 3D photogrammetry on Site, or floor plans and panoramas on Field.
Where aerial models live
The Site tab appears on properties at companies with the Site module, alongside the tabs every property has (Model, Files, Vision, Field, Property Members). Site is where aerial / drone-derived 3D content lives once uploaded and processed. Each property keeps its own list of aerial models on this tab.
Visibility of the Site tab depends on the Site module grant at the company level. CA-07 - Module gating reference maps which module unlocks which tab. This piece covers the upload only; viewing and measuring models inside the Site tab is outside its scope.
Two upload paths
On the Site tab, click Upload Model. The dialog ("Upload Aerial Model") opens. It supports two paths:
- 13D Tiles (already-processed) - Use this when you've already run photogrammetry processing in another tool (Context Capture, iTwin Capture Modeler, etc.) and have the output ready. CERQA uploads the tile set as-is and serves it from the Site tab.
- 2Raw Images (uploaded first, processed separately) - Use this when you have raw drone images and want CERQA to do the photogrammetry for you. The upload stores the photos at full resolution and reads position and camera angle from each file, so they line up with the 3D model on their own. It does NOT reconstruct anything. To build a model, use Start Processing from the model list afterwards; that step produces the 3D tiles, point cloud, orthophoto, and DEM.
3D Tiles path
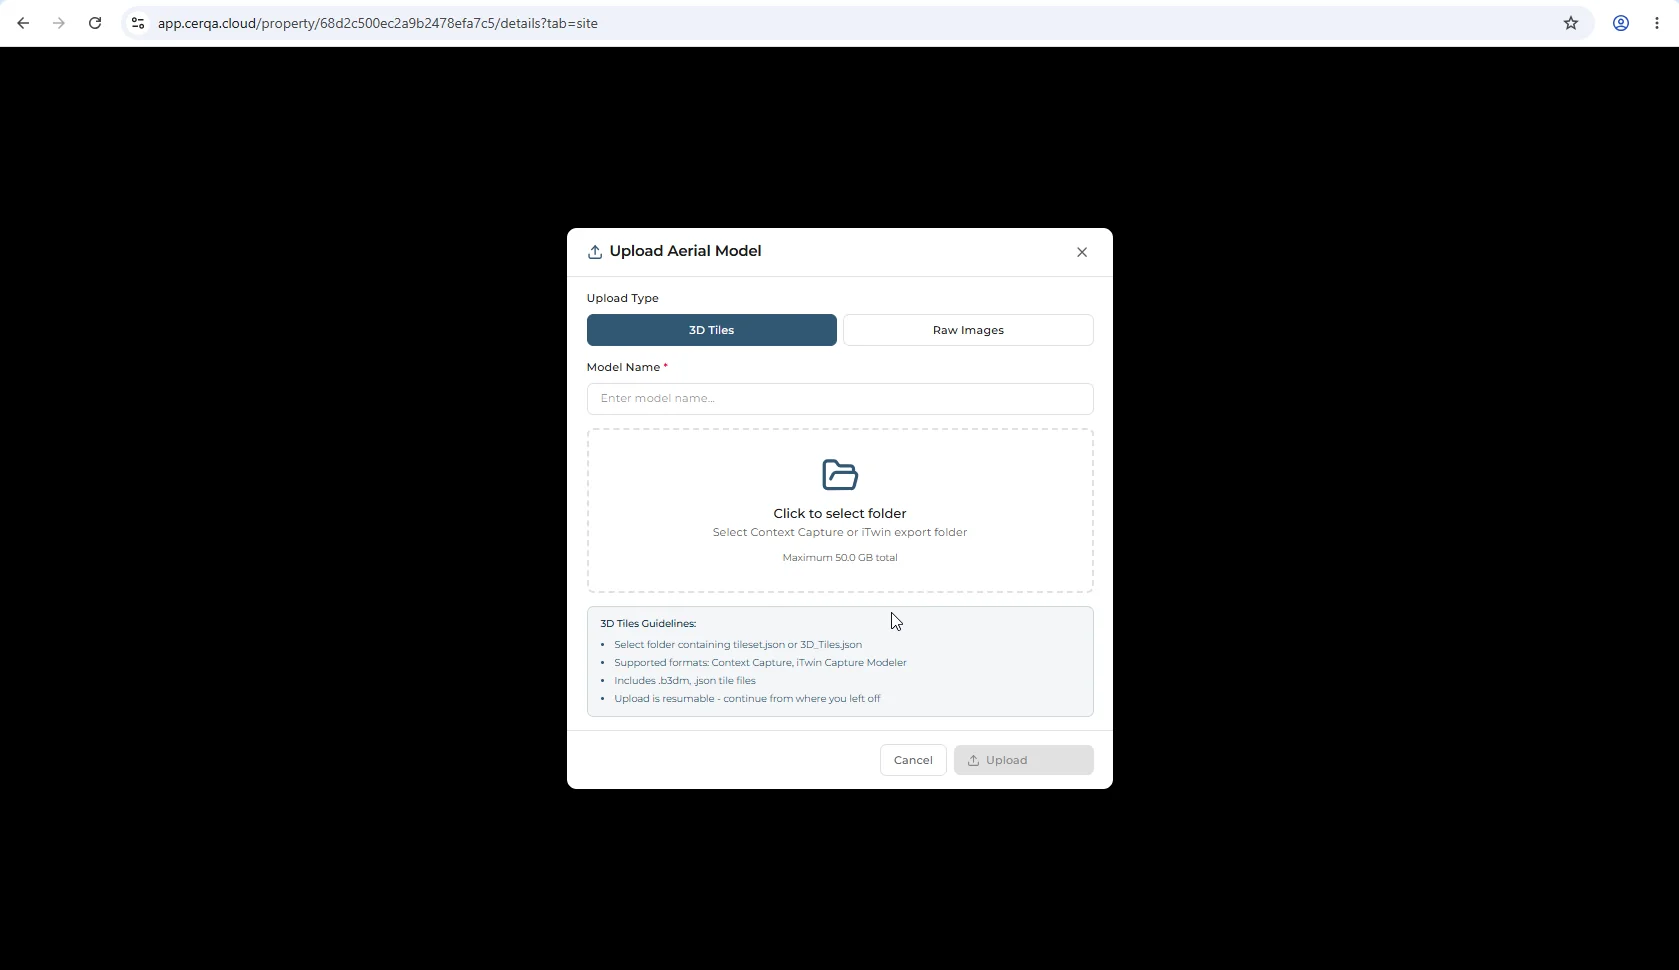
Pick the 3D Tiles option when your input is the output folder from a photogrammetry tool. Click the Click to select folder area and choose your Context Capture or iTwin Capture Modeler export folder. The two upload routes do not accept the same set: uploading a folder names Context Capture and iTwin Capture Modeler, while uploading an archive also accepts Metashape Pro, as a single .3tz or a zipped export.
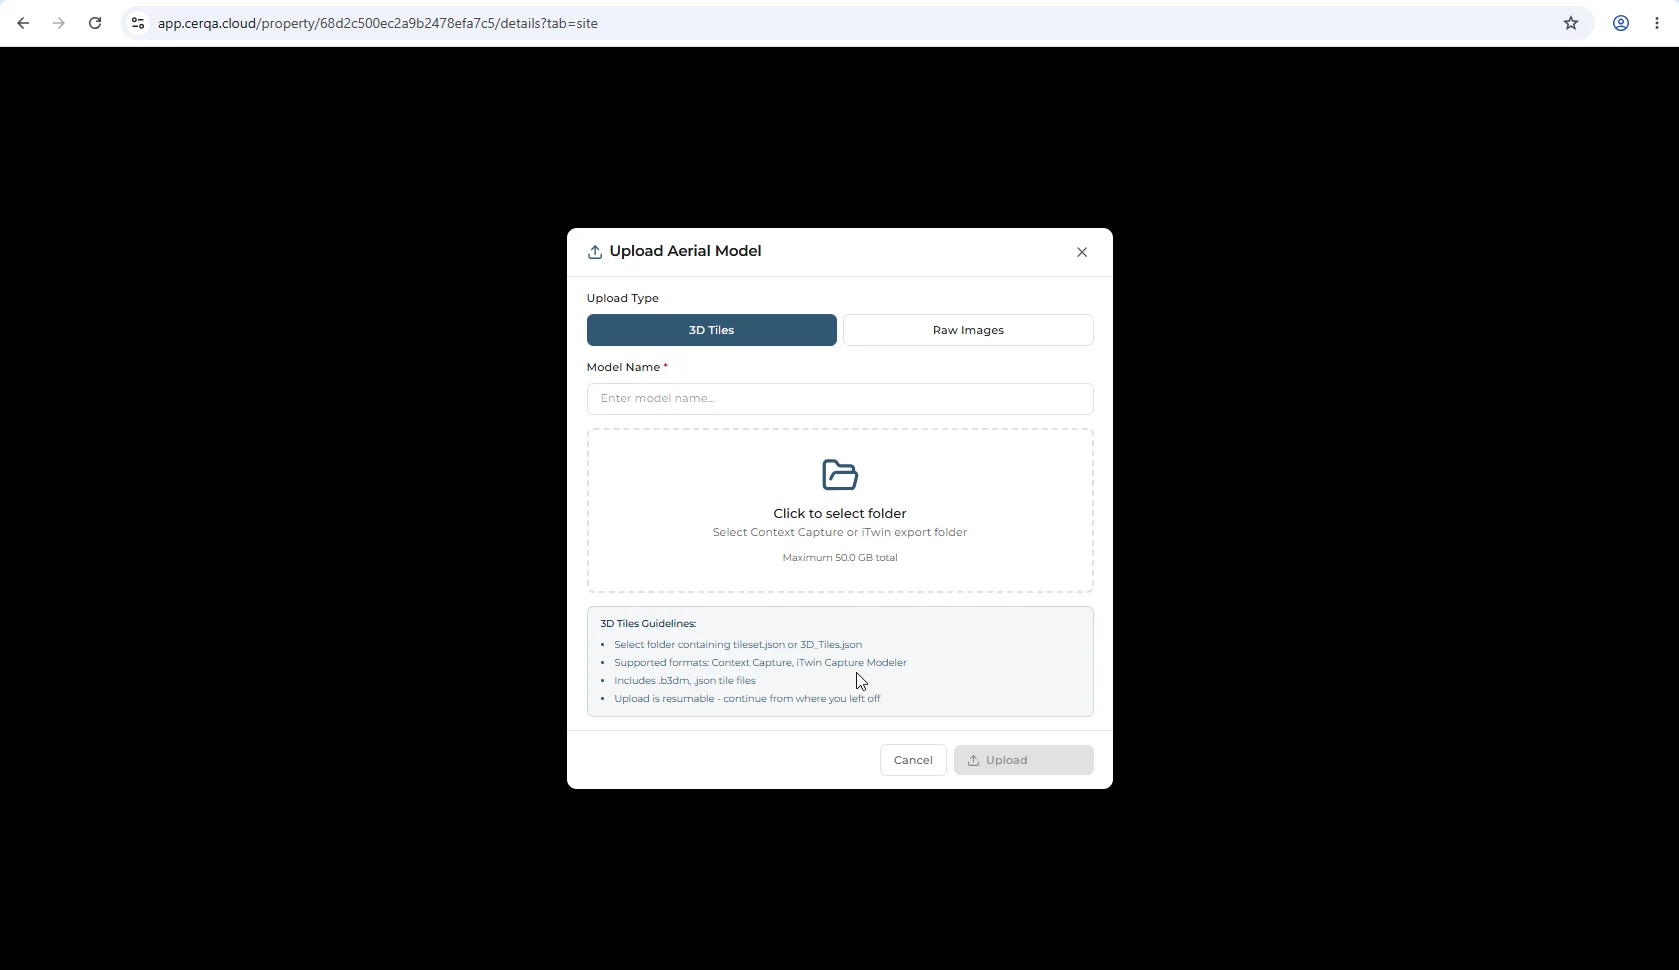
The 3D Tiles path expects:
- 1Tileset descriptor - The folder must contain a tileset.json or 3D_Tiles.json descriptor at its root. A Context Capture Production_*.json is also accepted as the root tileset.
- 2Supported source formats - For a folder upload, Context Capture and iTwin Capture Modeler. An archive upload additionally accepts Metashape Pro, as a single .3tz or a zipped export.
- 3Tile file types - The folder includes the .b3dm tile files and their .json descriptors. Other supporting files from the export folder are included.
- 4Size limit - Maximum 50.0 GB total per upload.
- 5Resumable - If the upload is interrupted (network drop, page close), you can resume it from where it left off. You don't have to start over.
Give the model a Model Name (required) so it's identifiable in the Site tab's model list. Click Save to begin the upload. Once it completes, the model appears in the Site tab list and is viewable in the Site tab's 3D viewer.
Raw Images path
Pick the Raw Images option when your input is the drone's raw image set and you want CERQA to do the photogrammetry processing for you.
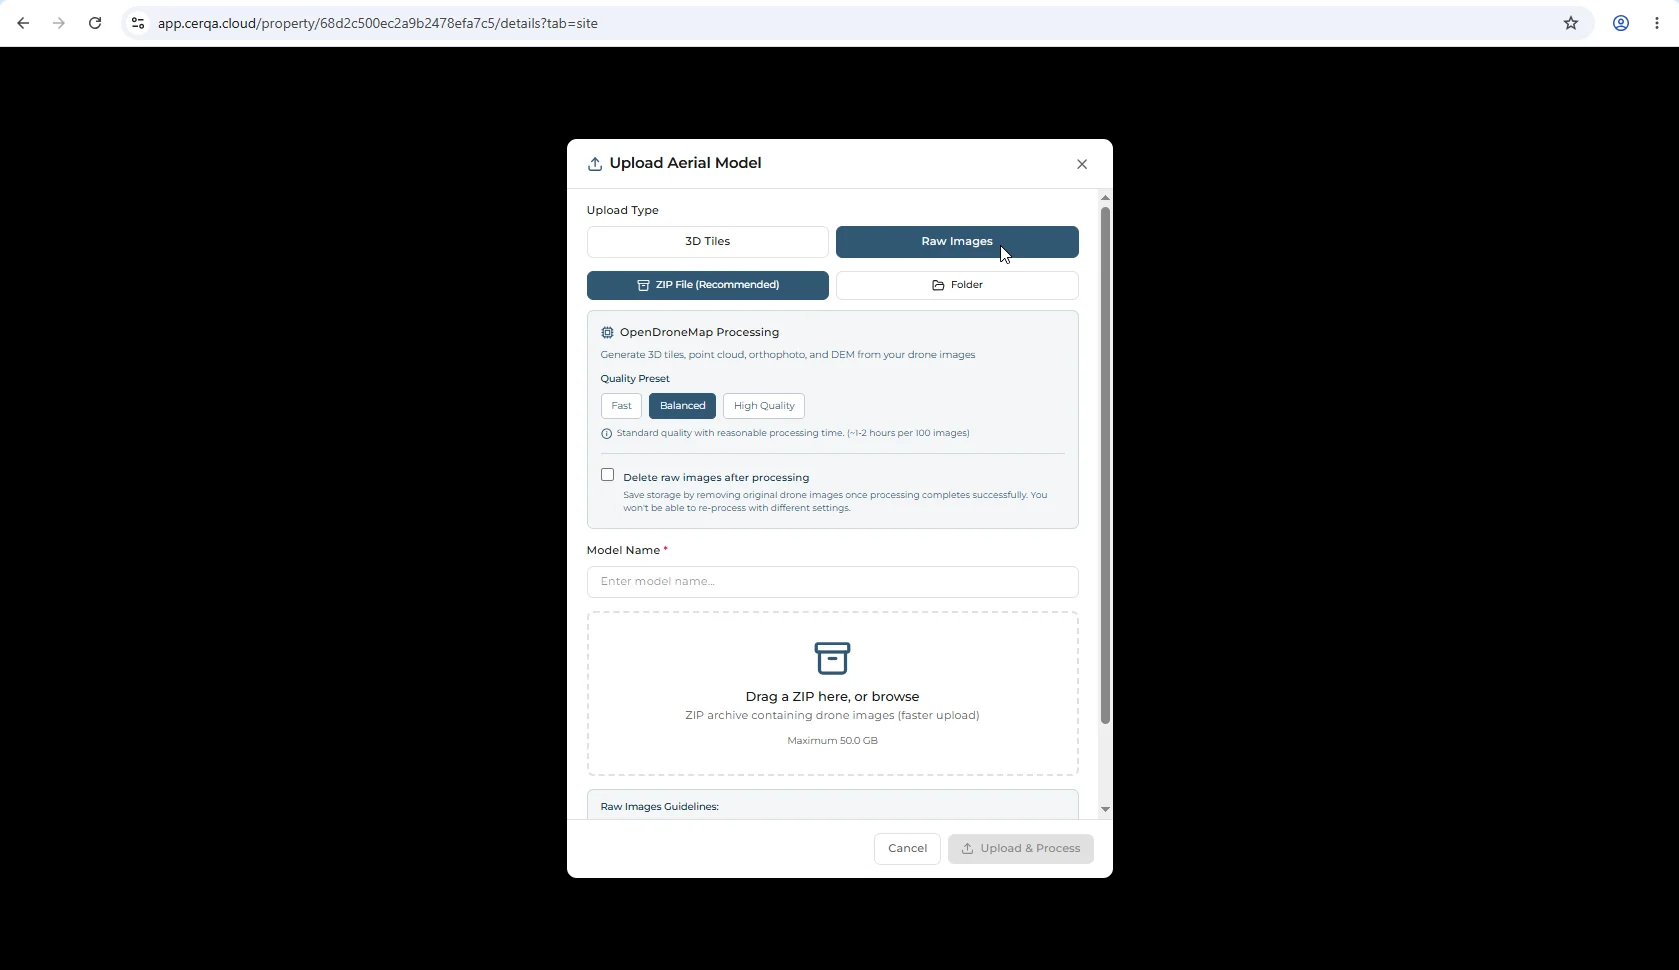
Choose the upload format:
- 1ZIP File (Recommended) - Bundle the drone images into a single .zip and upload that. Faster and more reliable than folder upload, especially on unstable connections.
- 2Folder - Upload a folder of image files directly. Use this when zipping isn't practical.
Give the model a Model Name (required), pick a quality preset (next section), and decide whether to delete the raw images after processing. Click Upload & Process to start.
After the upload finishes, processing begins. It runs on CERQA's servers, so you don't have to keep the dialog open. The model appears in the Site tab once processing completes.
Start Processing
Uploading photos does not reconstruct anything. The upload tab says so itself: “No reconstruction runs on upload. To build a model from these photos instead, use Start Processing from the model list.” Reconstruction is a second, deliberate action you start from the model list afterwards, and that is where you choose a quality preset. What you get back depends on the job that completed - treat the list below as what processing can produce, not as a guaranteed set:
- 13D Tiles - The 3D mesh of the surveyed area, viewable in the Site tab's 3D viewer. Note what the download gives you: the 3D mesh download retrieves a manifest, not a complete portable tileset you can hand to another tool.
- 2Point cloud - Dense point data of the surveyed area, useful for downstream measurement and analysis.
- 3Orthophoto - Top-down corrected aerial image - a flat, scale-accurate photo of the site.
- 4DEM (Digital Elevation Model) - Elevation data for the terrain. A DEM or DSM can be produced in the pipeline, but it is not guaranteed for a given job and there is no DEM entry in the Site tab's Download Outputs panel - so do not plan a deliverable around downloading one.
Quality presets and processing time
The presets are not on the upload tab. You choose one when you start the reconstruction from the model list, and they trade output fidelity for processing time:
- 1Fast - Quickest processing, lowest output fidelity. Good for previews and quick checks.
- 2Balanced (default) - Standard quality with reasonable processing time. Roughly 1-2 hours per 100 images. This is the default for most uploads.
- 3High Quality - Best output, longest processing time. Use this for final deliverables where output fidelity matters.
Delete raw images after processing
Large uploads, slow processing, or failed runs are the kinds of situations to escalate. CA-14 - When to call your CERQA Account Manager covers escalation paths.
Related pieces
- CA-07 - Module gating reference - the Site module subscription that unlocks this tab.
- F-04 - Roles and permissions - the role matrix governing who can upload to the Site tab (Project Admin and above).
- CA-14 - When to call your CERQA Account Manager - escalation paths for very large uploads or processing failures.