Modules
Vision & 360 walkthroughs overview
The Vision tab on a property opens 360 photo walkthroughs of the property. It opens Immersive by default (a 360 panorama fills the work area, with the floor plan as a mini-map bottom-right); from there you click a pin (on the mini-map, or on the plan in Split View / Floor Plan layout) to jump between captures, look around inside the 360, capture an image of what you see, and save a viewpoint when you find a useful frame. Vision is its own surface, distinct from the 3D BIM viewer on the Model tab; see M-01 - 3D Model Viewer overview for the model side. This page is the overview of Vision.
What Vision is
Vision turns 360 captures of a property into a walkable surface. A capture session lays down a sequence of 360 panoramas at points across the property; CERQA ingests the set and shows the floor plan with each capture marked as a clickable pin. Click a pin to enter the 360 view at that point; from there you can look around, walk to neighboring captures, or return to the plan.
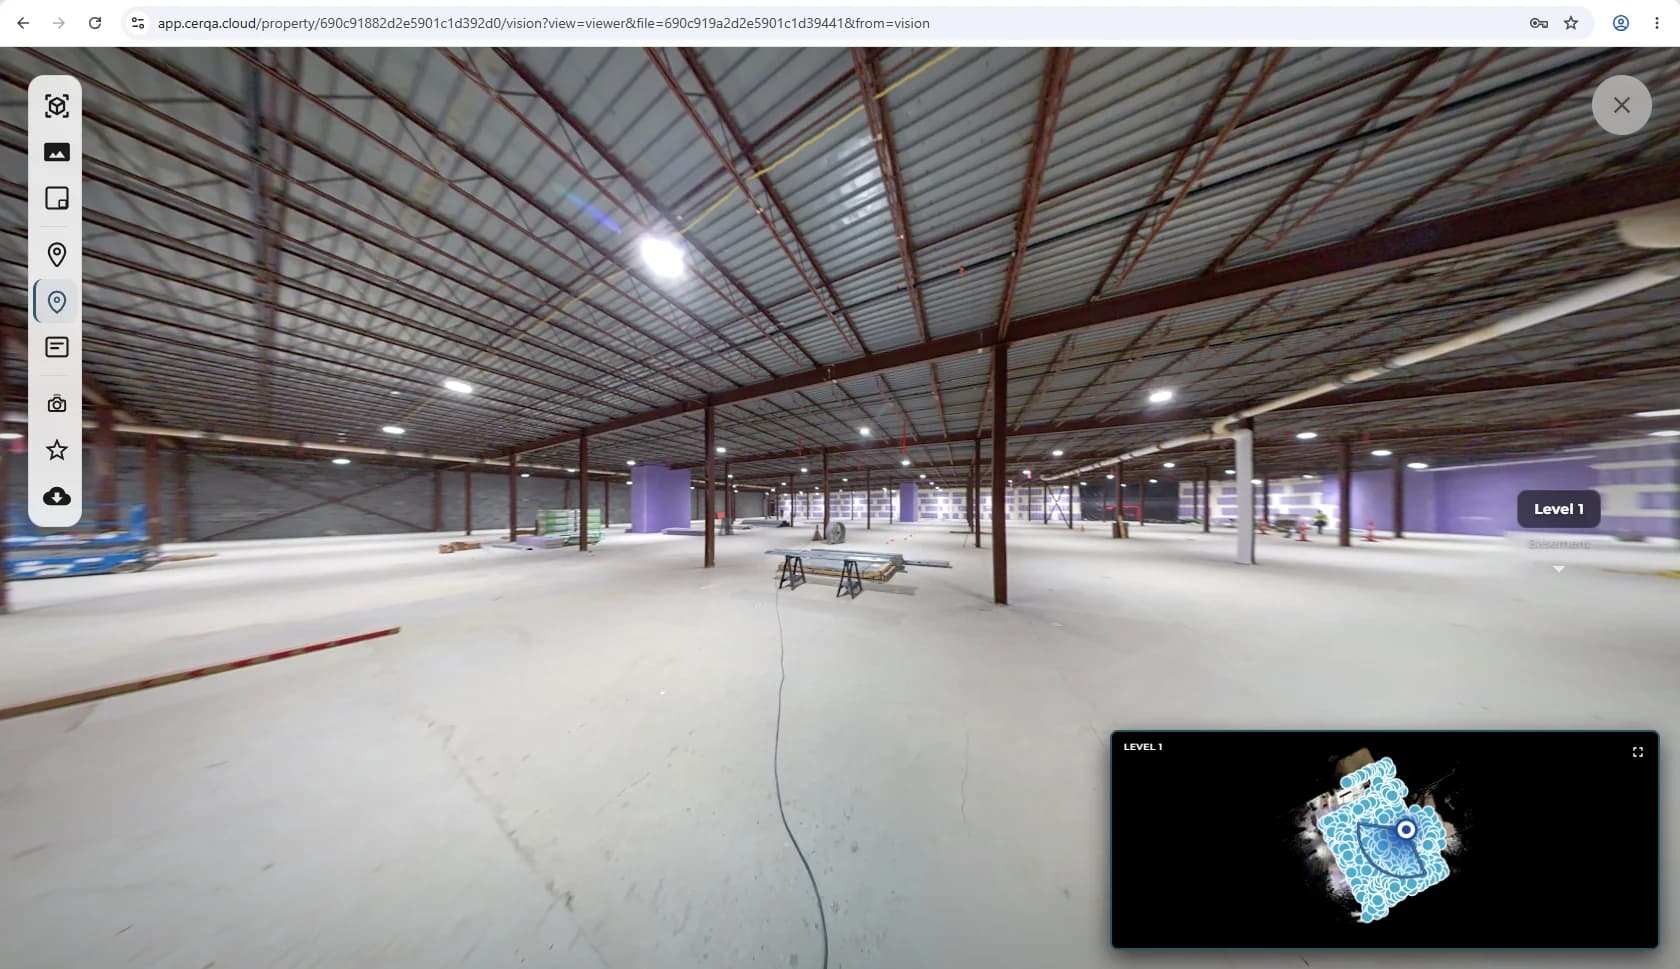
The walkthroughs themselves are produced upstream: raw 360 imagery is uploaded and processed into the walkable set before it appears here. Vision is where you view and work with the result.
Walkthrough pins on the floor plan
Pins on the floor plan mark the locations where 360 captures exist on the property. Every pin is a navigation hotspot, not an annotation.
From the floor plan, every pin on the property is visible and clickable. Click any pin to enter the 360 at that location.
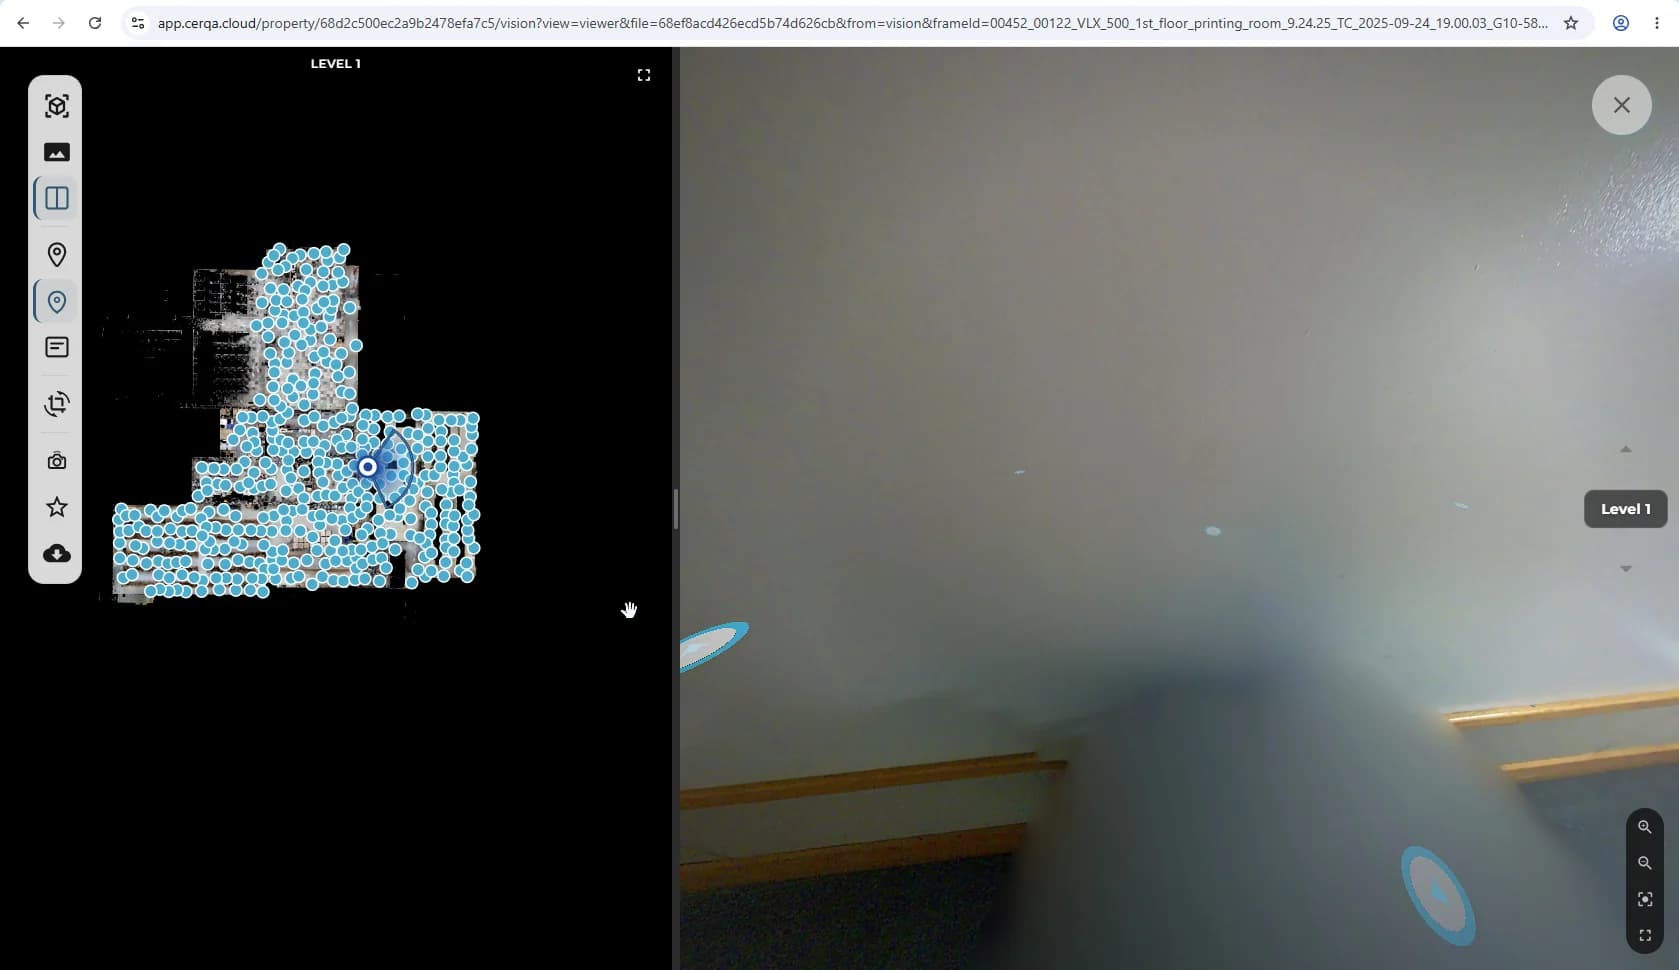
From inside a 360, only the pins spatially near the current capture appear as clickable overlays inside the panorama. Those neighboring pins are how you walk between adjacent captures without returning to the plan. To jump to a distant capture, return to the floor plan and click that pin.
Vision pins are navigation, not annotation
Clicking a pin moves you to a different 360 view; it is not an annotation. Text annotations on a 360 are a separate surface inside the 360 itself, covered in VS-03 - Vision annotations & measurements.
Inside a 360 view
Click any pin to enter the 360 view at that location. The floor plan shrinks (or hides, depending on your layout setting) and the 360 panorama fills the work area. From there:
- 1Look around - Drag inside the 360 to rotate the camera. Look up, look down, look behind you. The panorama surrounds you in every direction.
- 2Walk between captures - Click any pin overlaid inside the current view to jump to that 360. Only pins spatially near your current capture appear inside the panorama; those are the neighboring 360s reachable without returning to the floor plan.
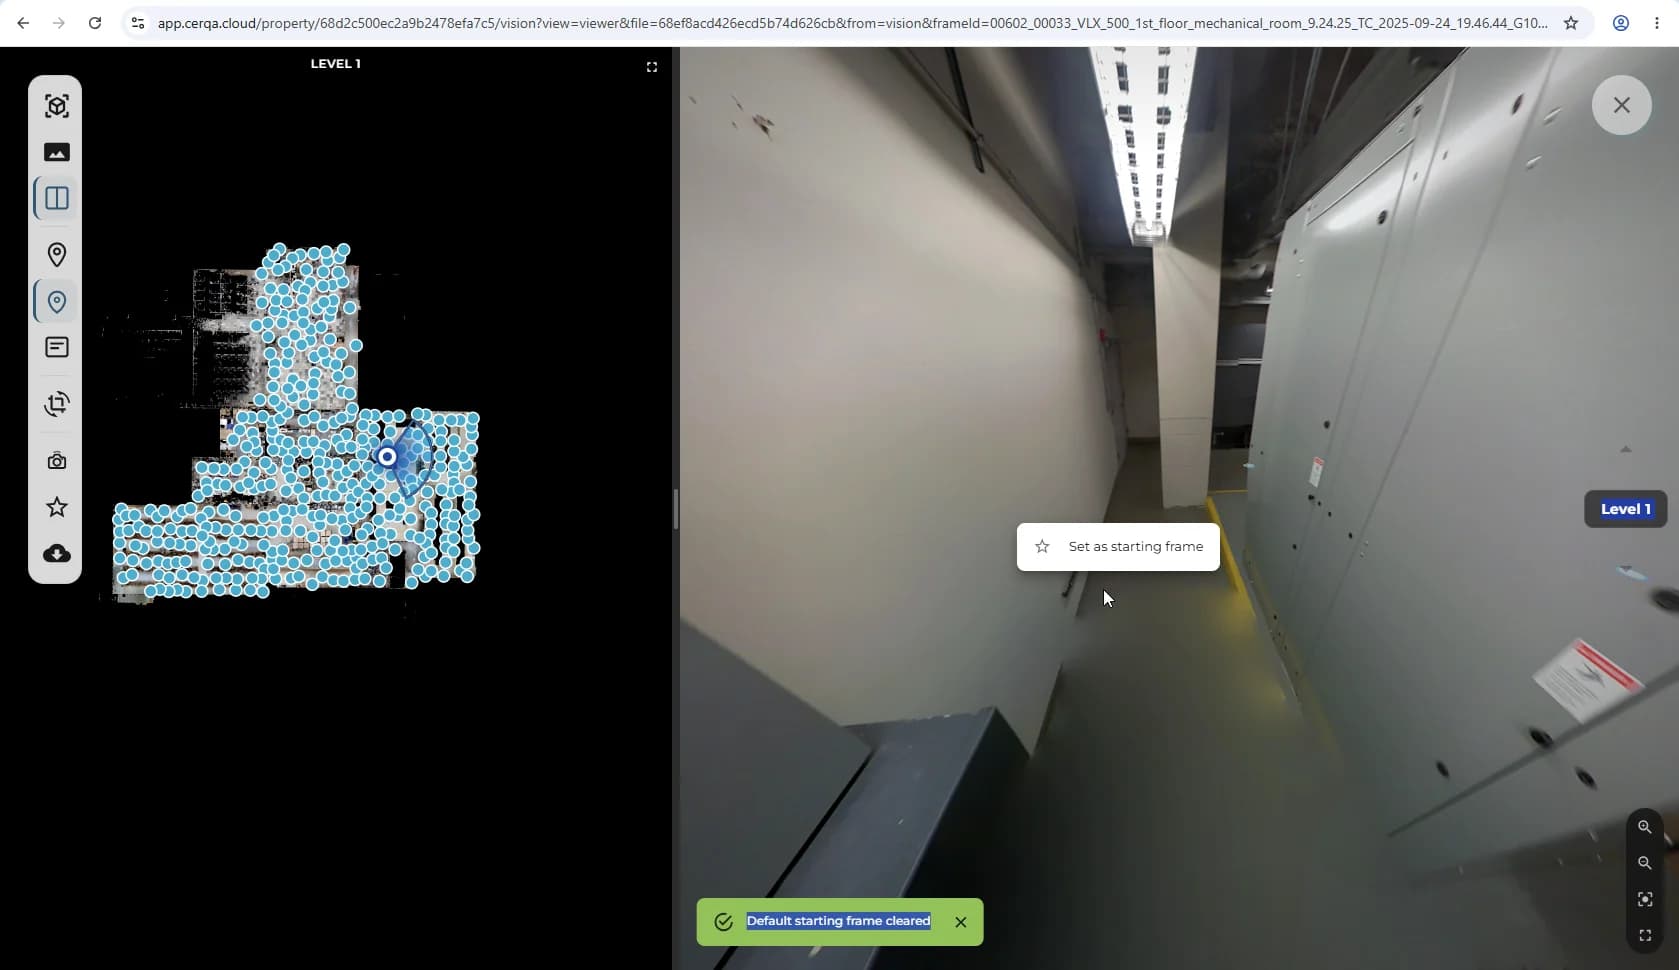
- 3Set as starting frame (right-click) - When you find a useful default entry point for the property (the front door, the main floor's center, a specific room), right-click inside the 360 and pick 'Set as starting frame'. The property defaults to that frame the next time anyone opens its Vision tab.
- 4Return to the floor plan - Use the back control in the viewer to return to the plan. Your last 360 position is remembered if you re-enter the same pin.
For the dual control system that governs how the floor plan and the 360 view share screen space (Floor Plan / Split View / Immersive) and which data layer renders (360 Panorama / Point Cloud / 3D Mesh), see VS-02 - Floor plans & navigation.
Capture image
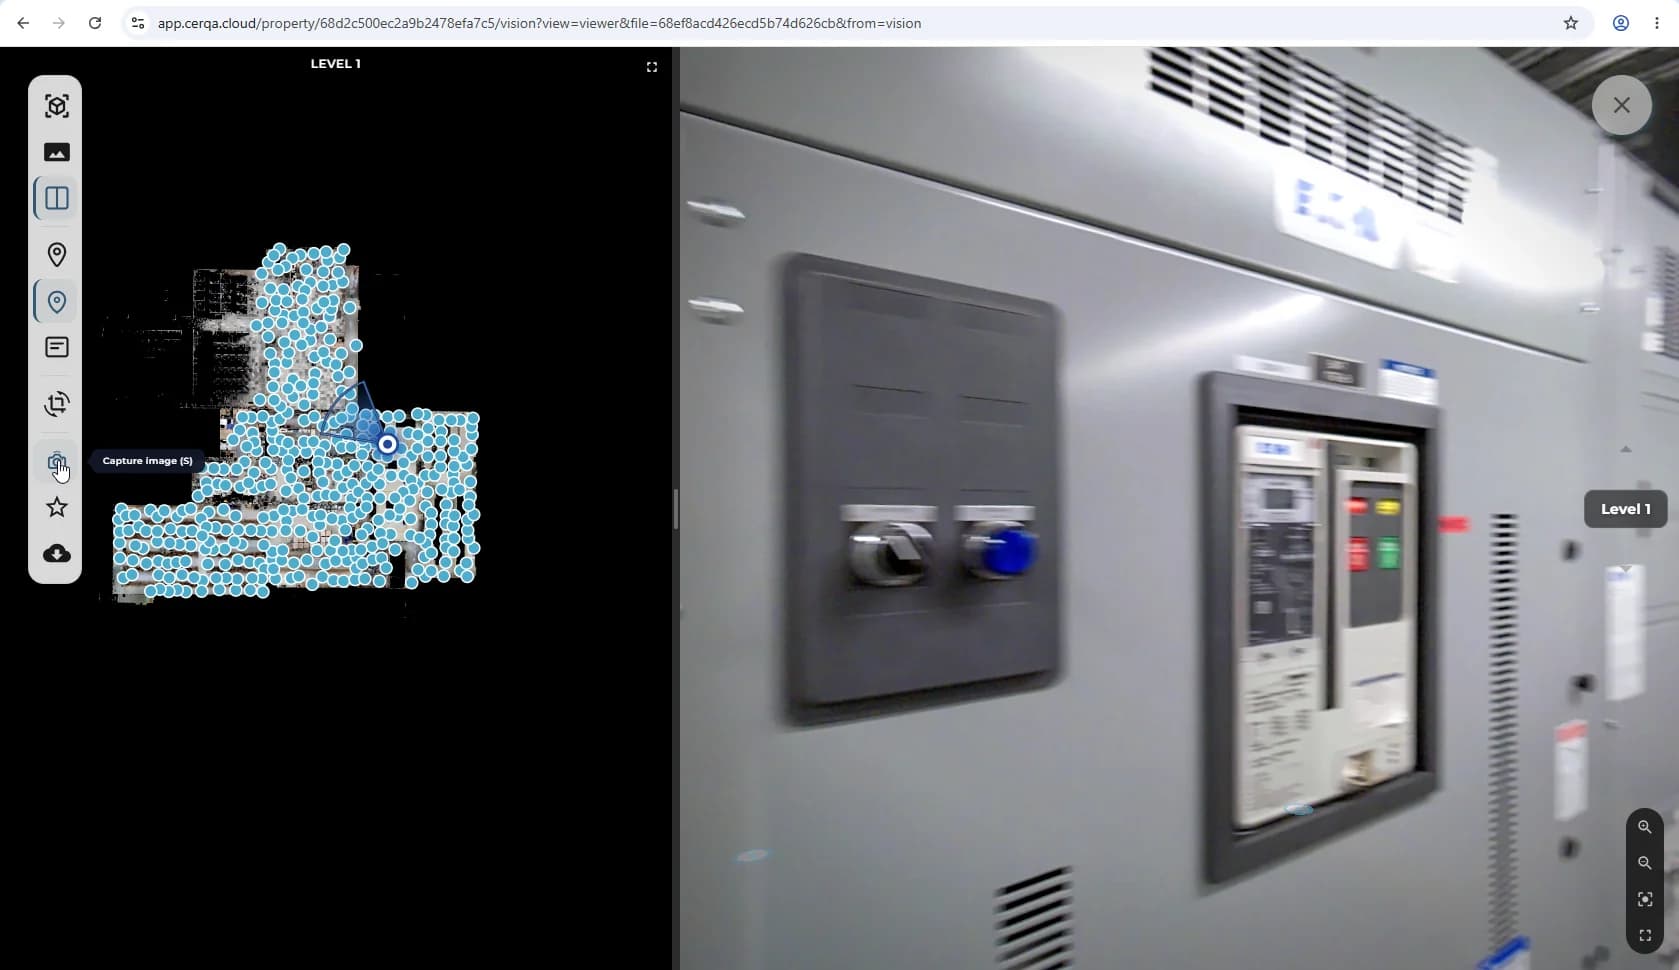
The Vision sidebar carries a camera icon that captures the current 360 view as a flat image. Use it when you need a still of what you are looking at, framed exactly as you see it, for a report or a discussion. There is also a keyboard shortcut: press S to capture without reaching for the sidebar. A short toast confirms the capture and the image is available to download or copy to the clipboard.
Viewpoints panel
The Viewpoints panel is Vision's equivalent of saving a useful frame so you can return to it later, or share it with the team. Open the panel from the Vision sidebar; it lists viewpoints saved on the property, with each entry marked as private (visible only to you) or shared (visible to other property members).
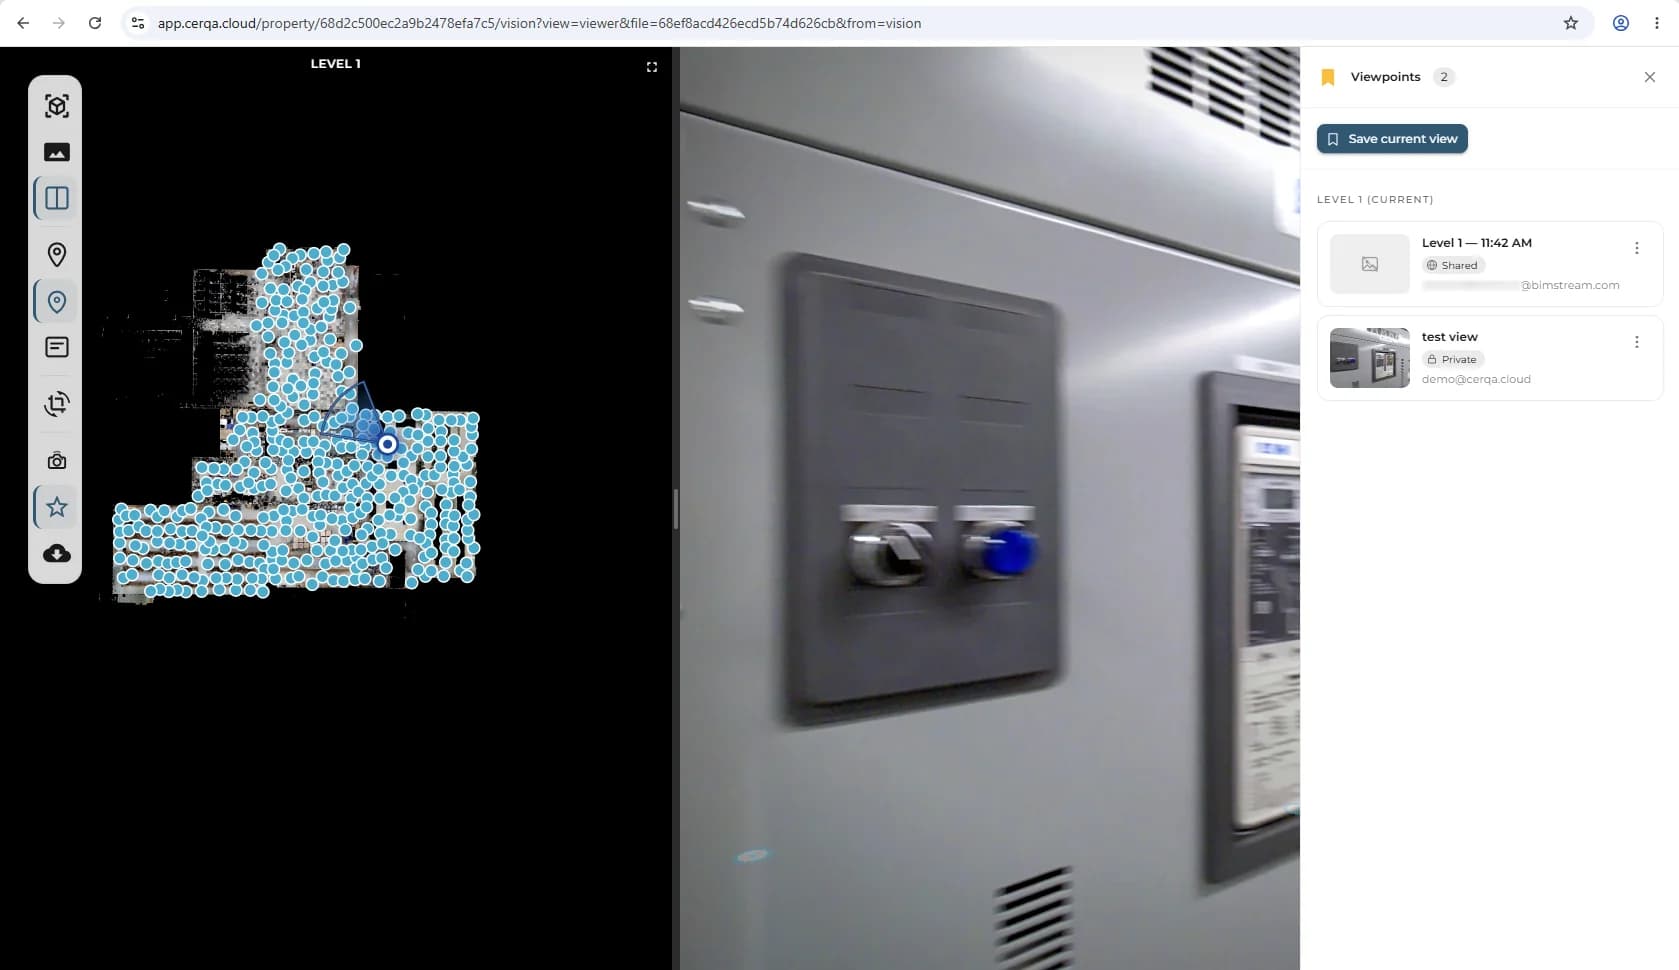
Viewpoints are not BIM Saved Views
The Viewpoints panel is Vision-side. It saves 360 viewpoints (a specific frame and look direction inside a 360). It is a different surface from the BIM viewer's Save Current View dialog, which saves the 3D model view (camera angle, level isolation, panels open) on the Model tab. Both exist, but they live on different tabs and save different things. For the BIM-side save-view, see M-01 - 3D Model Viewer overview.
Related pieces
- VS-02 - Floor plans & navigation - the dual control system (LAYOUT + VIEW MODE) and how to switch between Floor Plan, Split View, and Immersive layouts with 360 / Point Cloud / 3D Mesh as the data layer.
- VS-03 - Vision annotations & measurements - text annotations on the 360 panorama, threaded comments + @mentions, and the 4-mode Beta measurement suite (Distance / Area / Height / Horizontal).
- VS-05 - Vision mesh tools - enhanced measurement accuracy, backed by mesh-reconstructed geometry.
- M-01 - 3D Model Viewer overview - the 3D BIM viewer on the Model tab; distinct surface from Vision, and the home for the BIM Intelligence panels (Element Info on Hover, Element Properties, Sheets and Views).