Modules
Importing from Autodesk
CERQA can pull 3D models directly from your Autodesk Construction Cloud account into a property. The import starts on the property's Files tab: open the upload dialog and pick “Import from Autodesk” instead of “Upload Files”. It accepts source models from both Autodesk BIM 360 and the newer Autodesk Construction Cloud. The integration is one-way: Autodesk into CERQA. There is no reverse export from CERQA back into Autodesk.
Prerequisites - the Autodesk account is connected
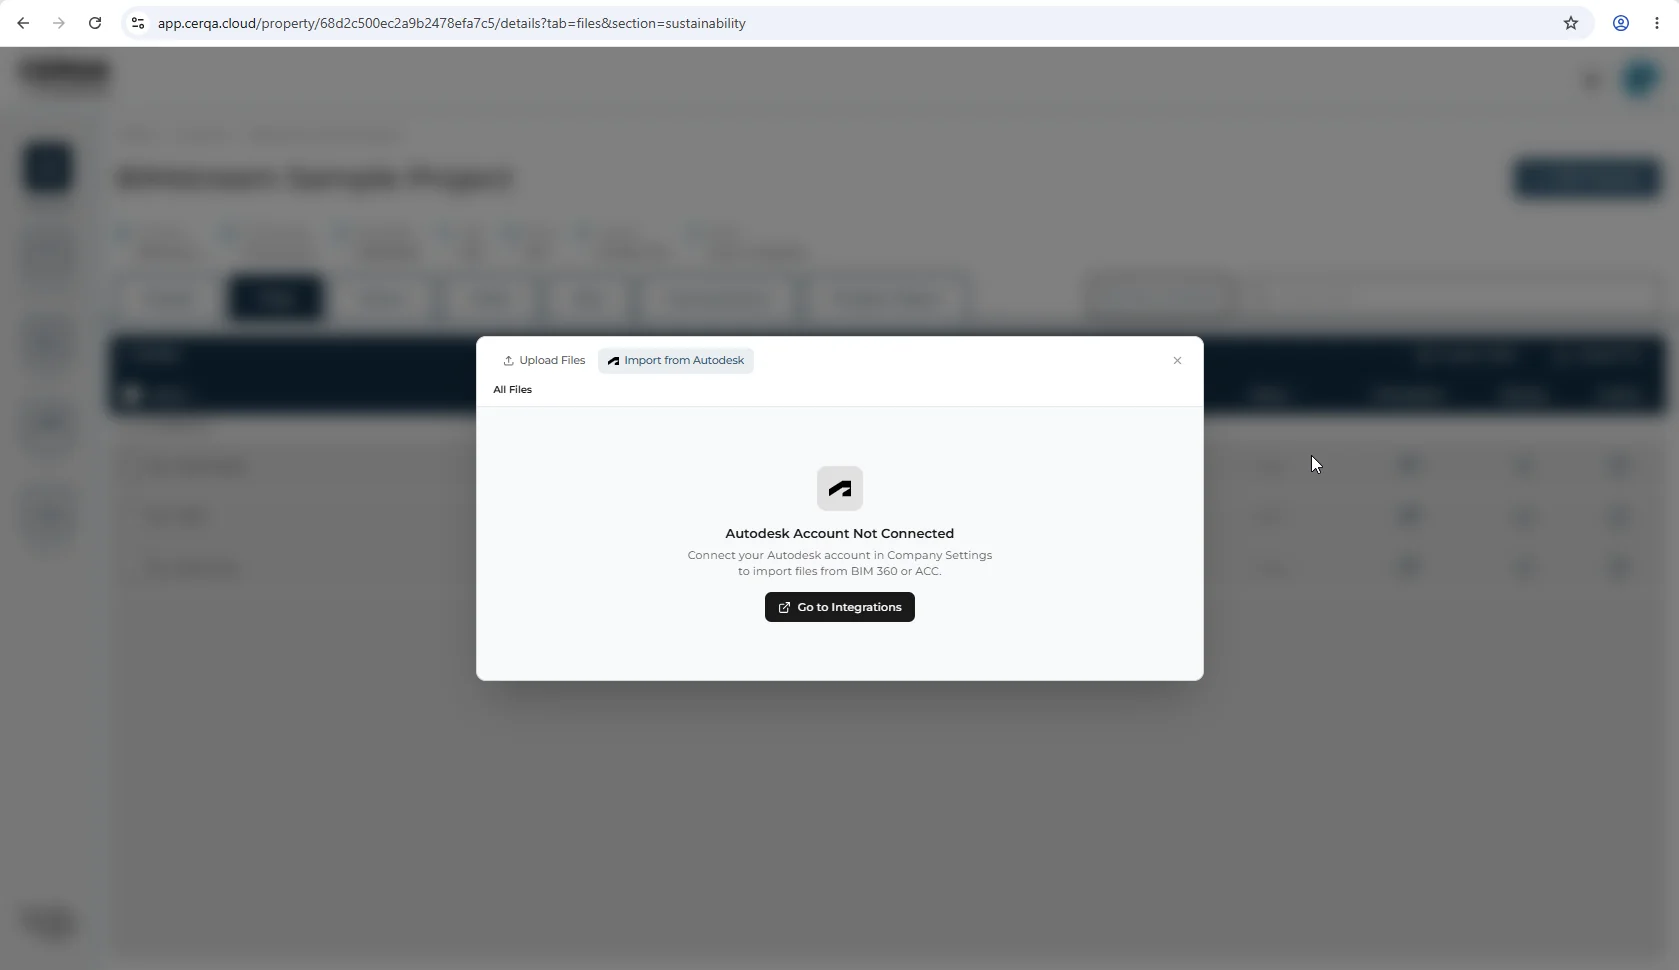
The import needs your own Autodesk account connected first. The connection is held per member, not per company: connecting yours does not connect it for anyone else, and a colleague connecting theirs does nothing for you. Until yours is connected, choosing “Import from Autodesk” shows an Autodesk Account Not Connected state with a Go to Integrations button instead of a file picker.
Today this import works only if you are a Company Admin or a Global Admin
The connection is made on the Company Settings Integrations page, and that page admits only Company Admins and Global Admins. The Import from Autodesk tab itself is not role-gated, so a Project Manager or Contributor can open it, see the not-connected state, and follow its Go to Integrations button to a page that refuses them. If that is you, there is currently no way to complete the import, and no amount of Company Admin help will connect it on your behalf. This dead end has been raised with engineering; if it is fixed, this prerequisite changes.
For the Integrations page and who can reach it, see CA-08 - Connecting Energy Star Portfolio Manager, which walks the same Integrations surface.
Opening the import
On a property's Files tab, open the upload dialog. It offers two options: “Upload Files” for files from your machine, and “Import from Autodesk” for models held in Autodesk. Pick Import from Autodesk to start. CERQA opens a picker that browses your Autodesk content: hubs, projects, folders, and files. CERQA does not ask you for credentials at this step; the connected account handles the sign-in.
Picking the file to import
With the account connected, the picker walks you from hub to project to folder to file, then imports what you check.
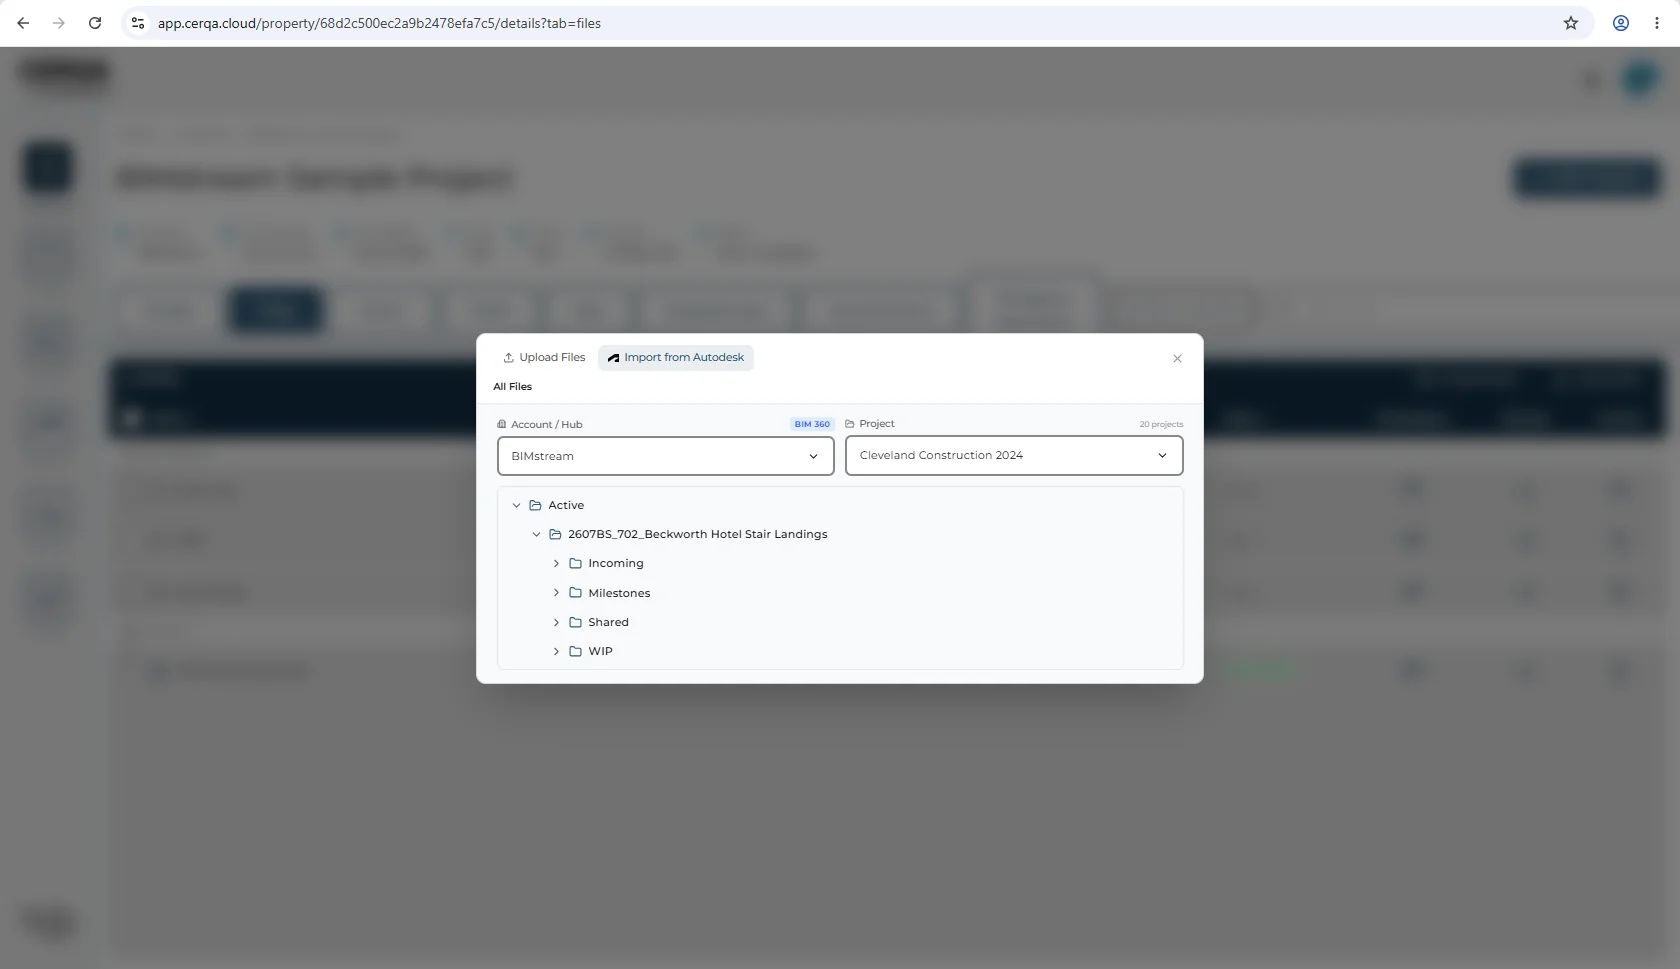
- 1Pick the Account / Hub - The picker opens with two dropdowns: Account / Hub (prompting “Select a hub”) and Project (prompting “Select hub first”, since it depends on the hub). Choose the hub; it shows with its source badge, so a BIM 360 hub is labeled BIM 360.
- 2Pick the Project - With a hub chosen, the Project dropdown fills in and shows how many projects it holds (for example, 243 projects). Pick the project you are importing from.
- 3Browse to the folder - A folder tree appears. In the delivered capture it is rooted at Active, with the project folder beneath it and that folder's subfolders under that (Incoming, Milestones, Shared and WIP are the common Autodesk set). Expand into the folder that holds the model you want
- 4Check the files you want - Files list with a checkbox each and a format tag showing the file type (DWG, for example). Check one or more.
- 5Import - The footer keeps a running count, “N file selected”, next to an Import N File(s) button. Click it and CERQA queues the import.
The picker also offers an option to notify you when new versions are available on ACC. Turn it on for a file whose Autodesk source you expect to be revised, and CERQA tells you when a newer version exists on the Autodesk side.
Returning to CERQA and import processing
After you confirm the file in Autodesk's picker, you return to CERQA. The file enters CERQA's processing queue: download from Autodesk, then model processing on the CERQA side. Processing time scales with file size and complexity, from a few minutes for small models up to longer waits for large Revit files. The Model tab shows the imported model as a new row in the model list once processing completes.
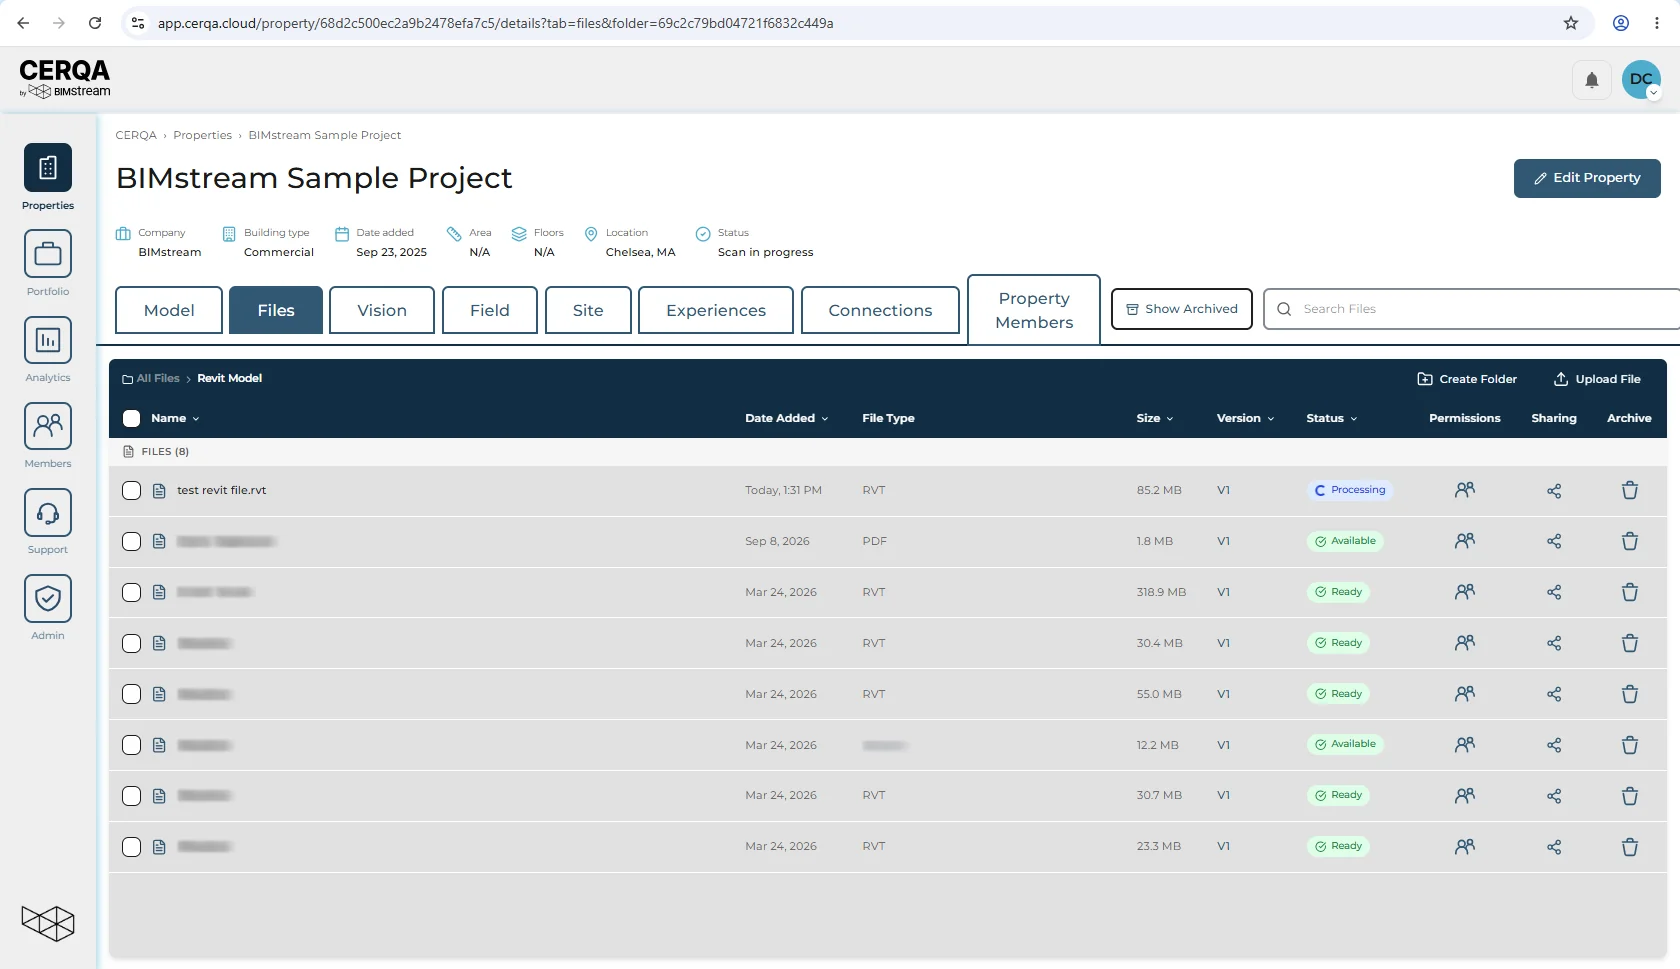
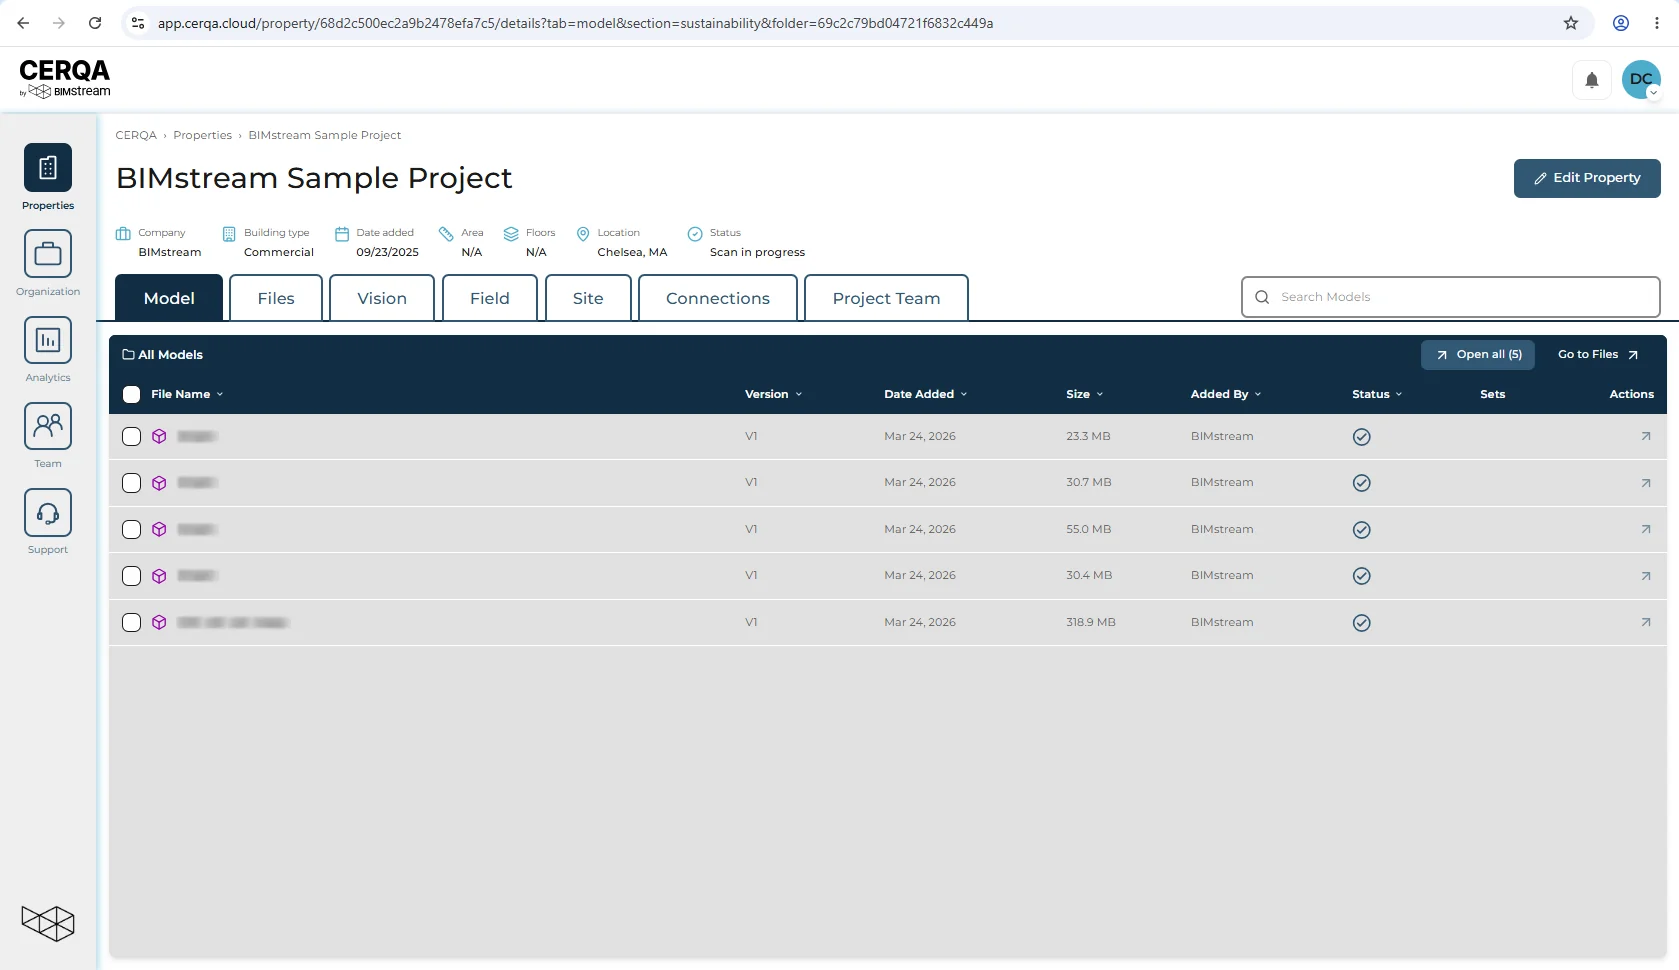
Where a file lands depends on what it is, and the rule is the same for both upload options. BIM model files (.rvt, .ifc, .nwc, .nwd) surface in the Model tab. Everything else (PDF, Office, CAD, images) stays in the Files tab. So an Autodesk import starts in Files and its models appear in Model. See D-01 - Files & Models module overview for the Files side. The Model-tab viewer itself is covered in M-01 - 3D Model Viewer overview; multi-model coordination across imports lives in M-03 - Model sets & multi-model coordination.
One-way only - no reverse export from CERQA to Autodesk
The integration goes one direction. You can pull a model from Autodesk into CERQA. You cannot push a model from CERQA back into Autodesk Construction Cloud or BIM 360. If your team needs CERQA-side outputs (a marked-up PDF, an annotated 360 capture, a saved coordination view, a screenshot) to land in your Autodesk environment, that's a manual workflow outside of CERQA's integration: export the item from CERQA in the usual way and bring it into Autodesk by hand.
No reverse-export feature exists today
This is the definitive answer to the “can I move a model from CERQA into my Autodesk account?” question. The capability does not exist today. If this becomes important to your team, raise it via your CERQA Account Manager (see CA-14) so it reaches the product team.
Related pieces
- M-01 - 3D Model Viewer overview - where the imported model lives once processing completes; navigation, BIM Intelligence, saved views.
- M-03 - Model sets & multi-model coordination - imported models join the set; useful when you pull arch, struct, and MEP into CERQA from Autodesk and want to coordinate across them.
- D-01 - Files & Models module overview - the Files tab, where the import starts and where non-model files stay.
- CA-14 - When to call your CERQA Account Manager - the escalation path for connecting the Autodesk integration, fixing auth errors, or asking about the missing reverse-export capability.
- F-04 - Roles and permissions - the complete role matrix for who can do what across CERQA. Initiating an Autodesk import is available to Company Admin and Global Admin, because each connects their own Autodesk account on a page only they can open.