Company Admin
Managing members
Managing members is where most Company Admin work concentrates after the initial team setup. This piece covers changing a role, modifying company-wide module access, setting an access expiry, deactivating or deleting a member, and managing per-property team assignments from the Property Members tab on a property.
For the inverse flow (inviting new members to your company at the company level), see CA-04 - Adding members to your company. For the three-layer module access model that frames the per-member changes here, see CA-01 - What you actually own as Company Admin. For the complete role-by-role permission matrix, see F-04 - Roles and permissions.
Finding a member and opening Member Details
Open the Team page from the sidebar (see CA-02 - Logging in and your sidebar for where Team lives). Filter, search, or sort to find the member you need to edit. Click any member row to open their Member Details modal.
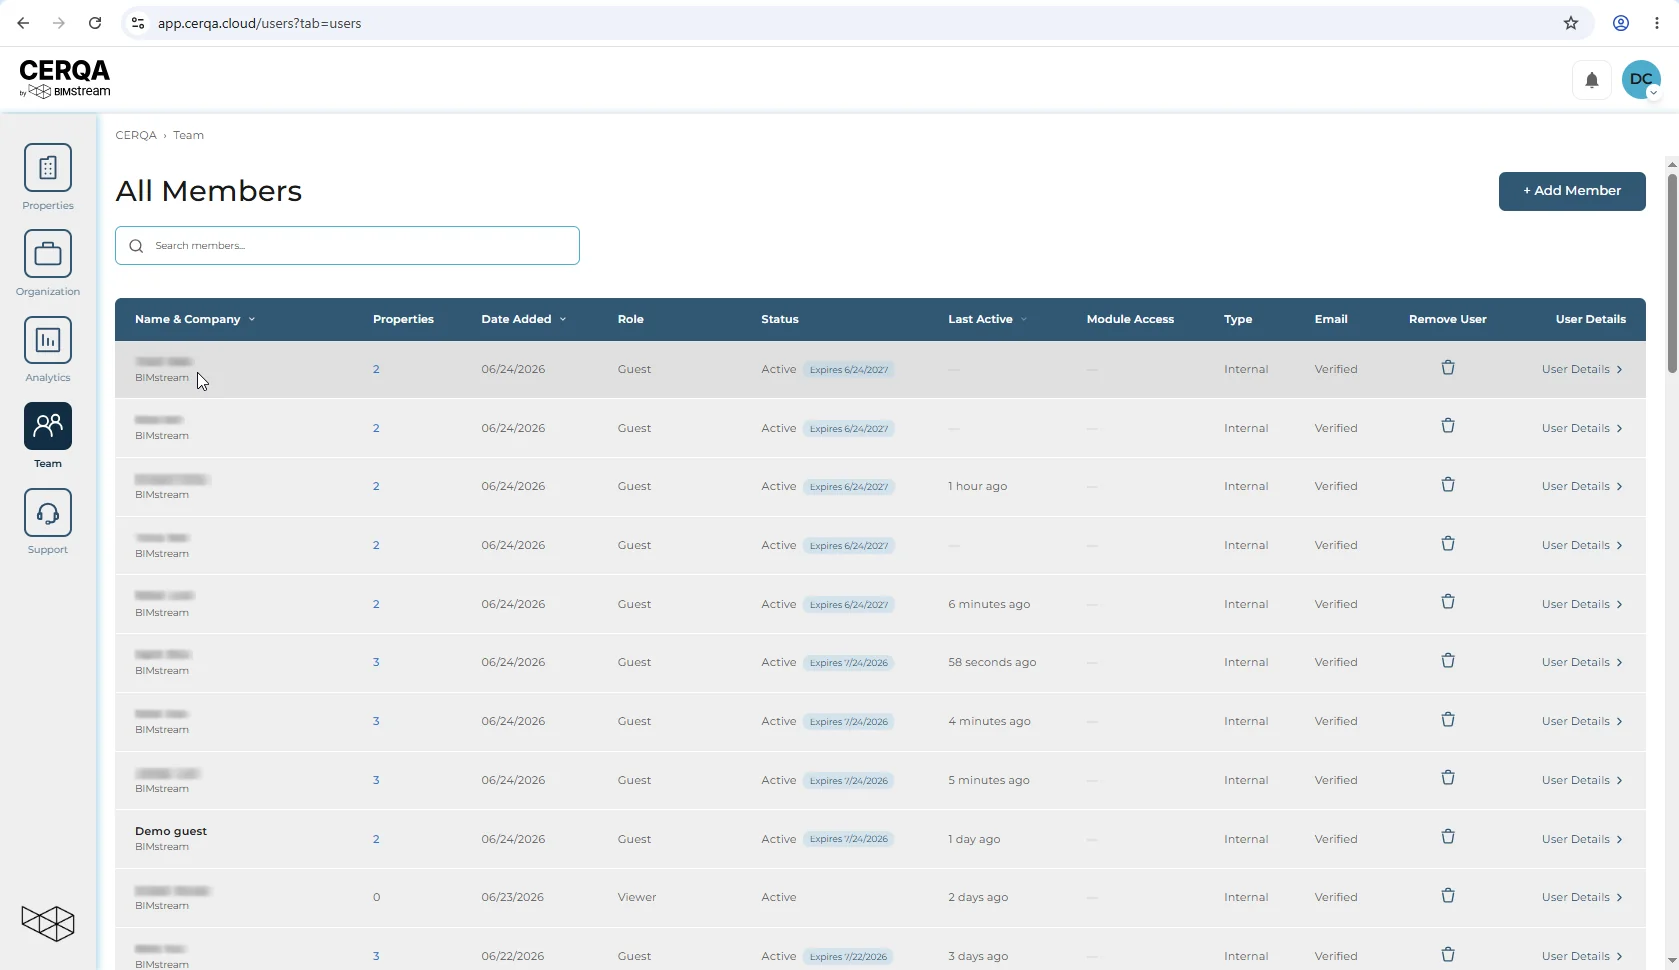
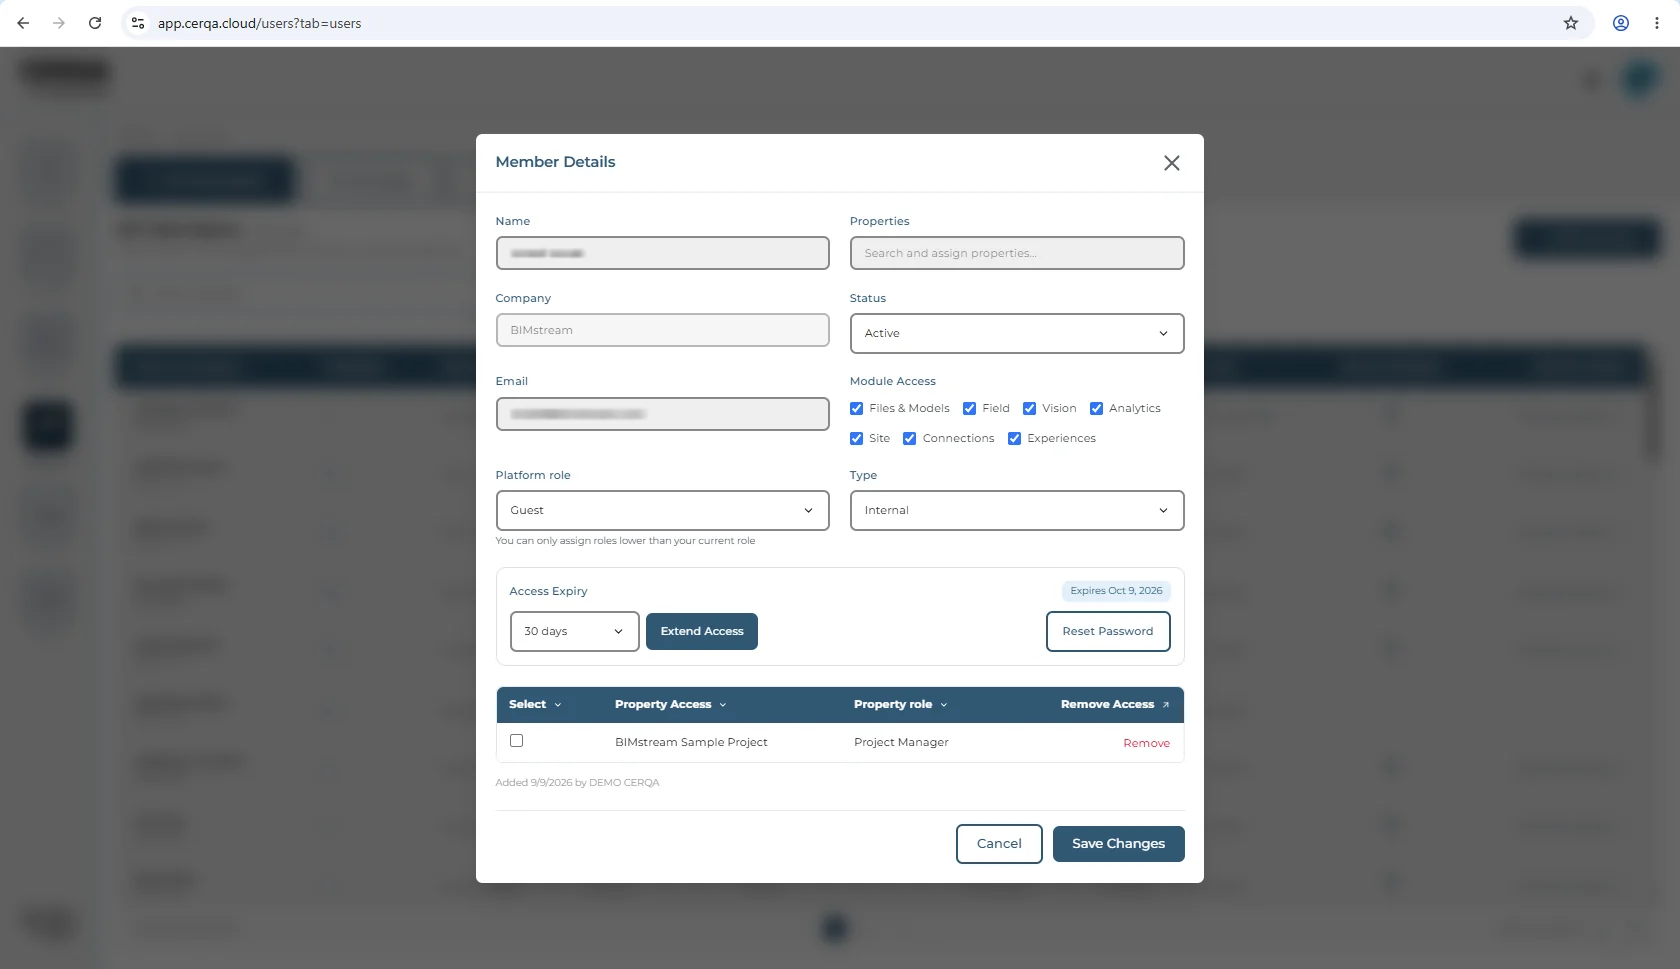
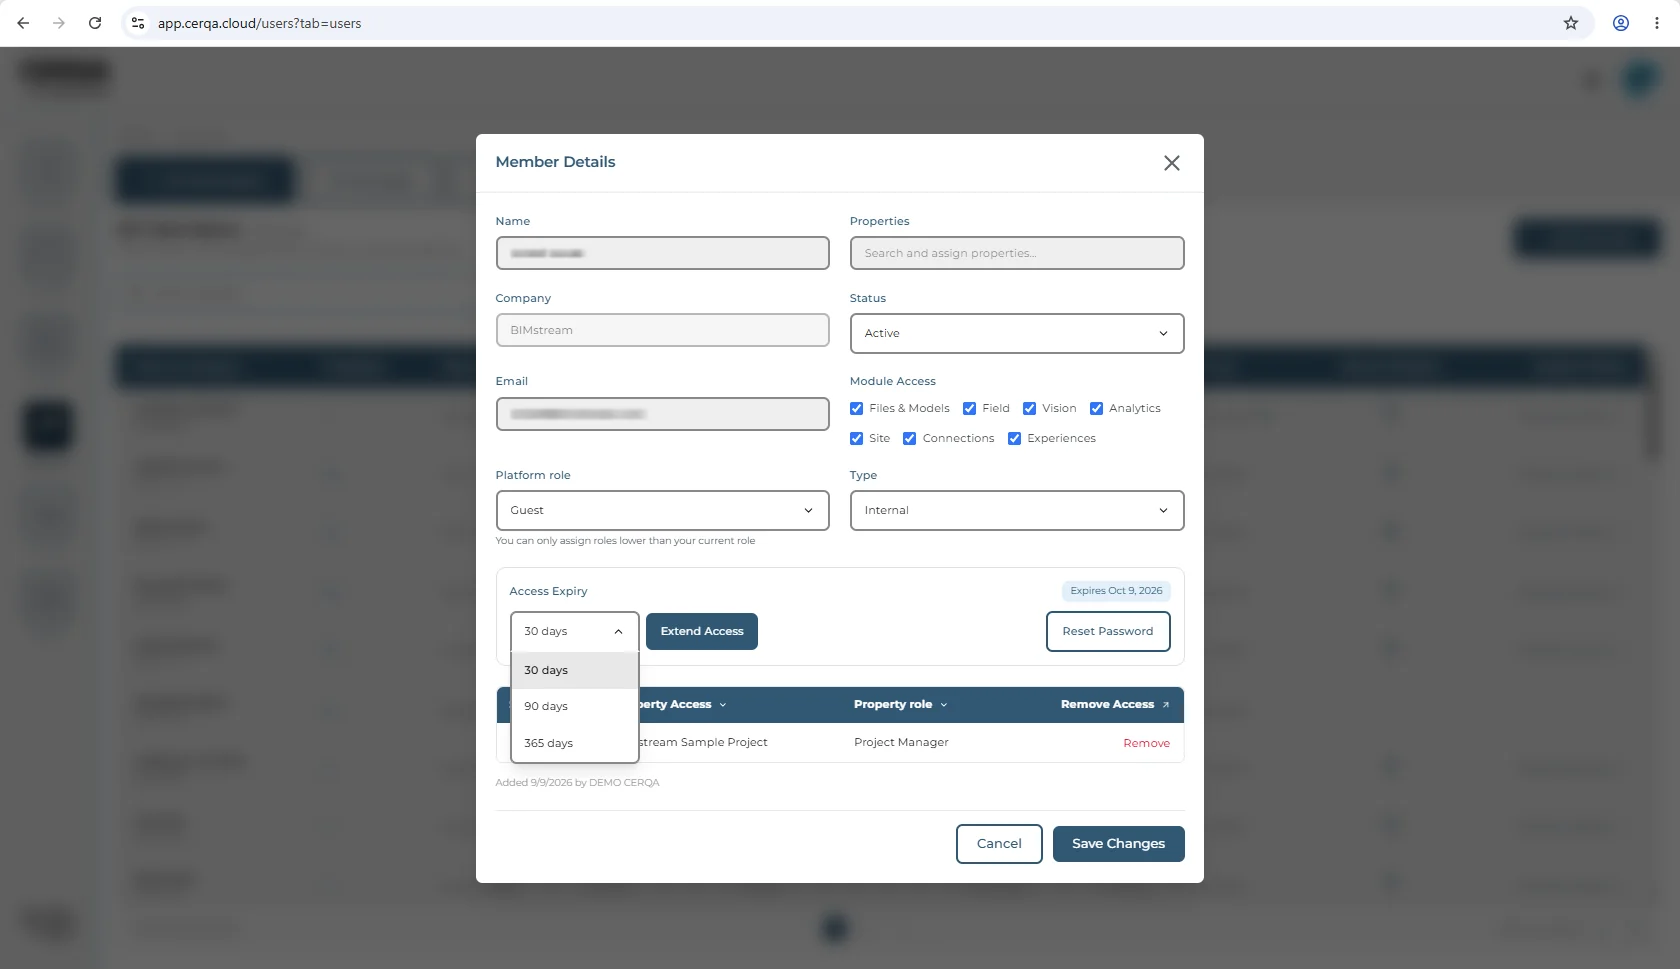
The Member Details modal edits this member's account. It shows three regions with different scopes: the Platform role dropdown (the member's company-level role), the Module Access checkboxes (the member's company-wide module access), and the Access Expiry duration dropdown (the expiry on the member's property assignment, covered in Setting Access Expiry below).
For visibility across every property a member is assigned to, navigate to each property's Property Members tab (covered below in the per-property team management section).
Changing role
The role dropdown in Member Details is labeled “Platform role”. Pick a new role and click Save. The member's capabilities update on next page load; they don't need to sign out and back in.
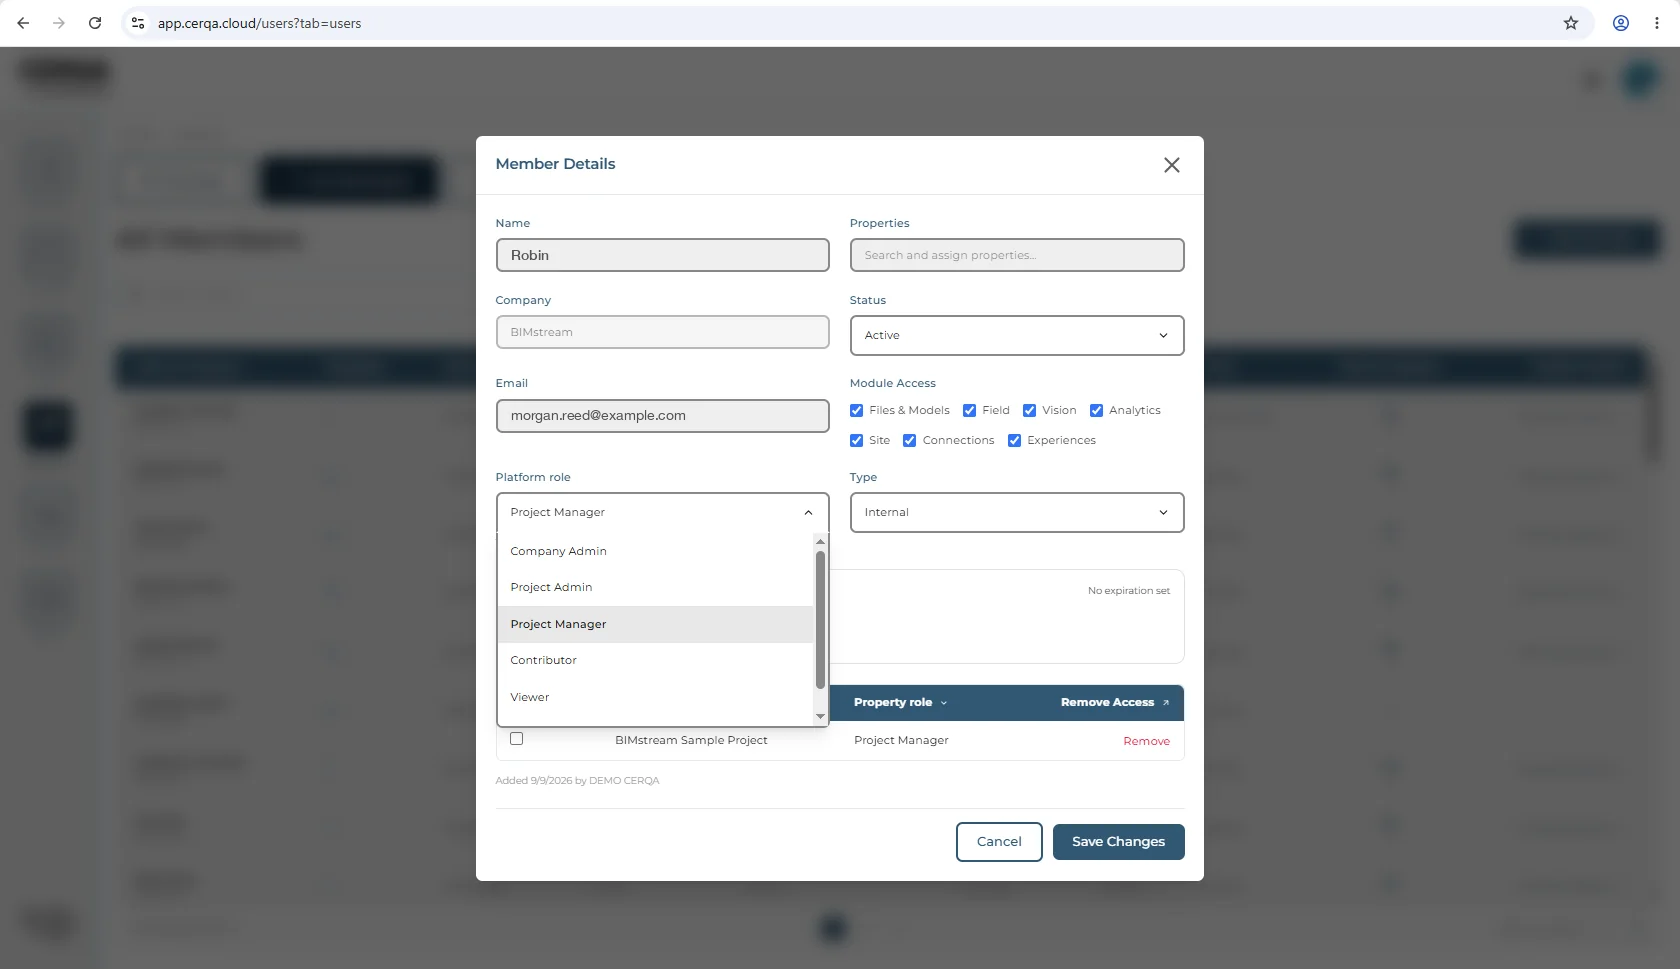
The UI does not pre-filter the dropdown
You are blocked from assigning at or above your own level, but the rule is enforced when you save, not in the dropdown. A Company Admin sees Company Admin in the dropdown and can select it. The block happens on save: the server returns an error. In practice: you will be blocked at save, not prevented from seeing roles above yours.
For the complete role matrix, see F-04 - Roles and permissions.
Modifying company-wide module access
Scroll to Module Access in the Member Details modal. A checkbox appears for each module your company has been granted. Every company sees Files & Models (DOCUMENTS), Field, and Vision; companies with Site (AERIAL), Connections, or Analytics, or Experiences see those checkboxes as well. There is no Sustainability checkbox: Sustainability is a section inside the Connections tab, and the Connections grant covers it. Each box governs this member's company-wide access to that module.
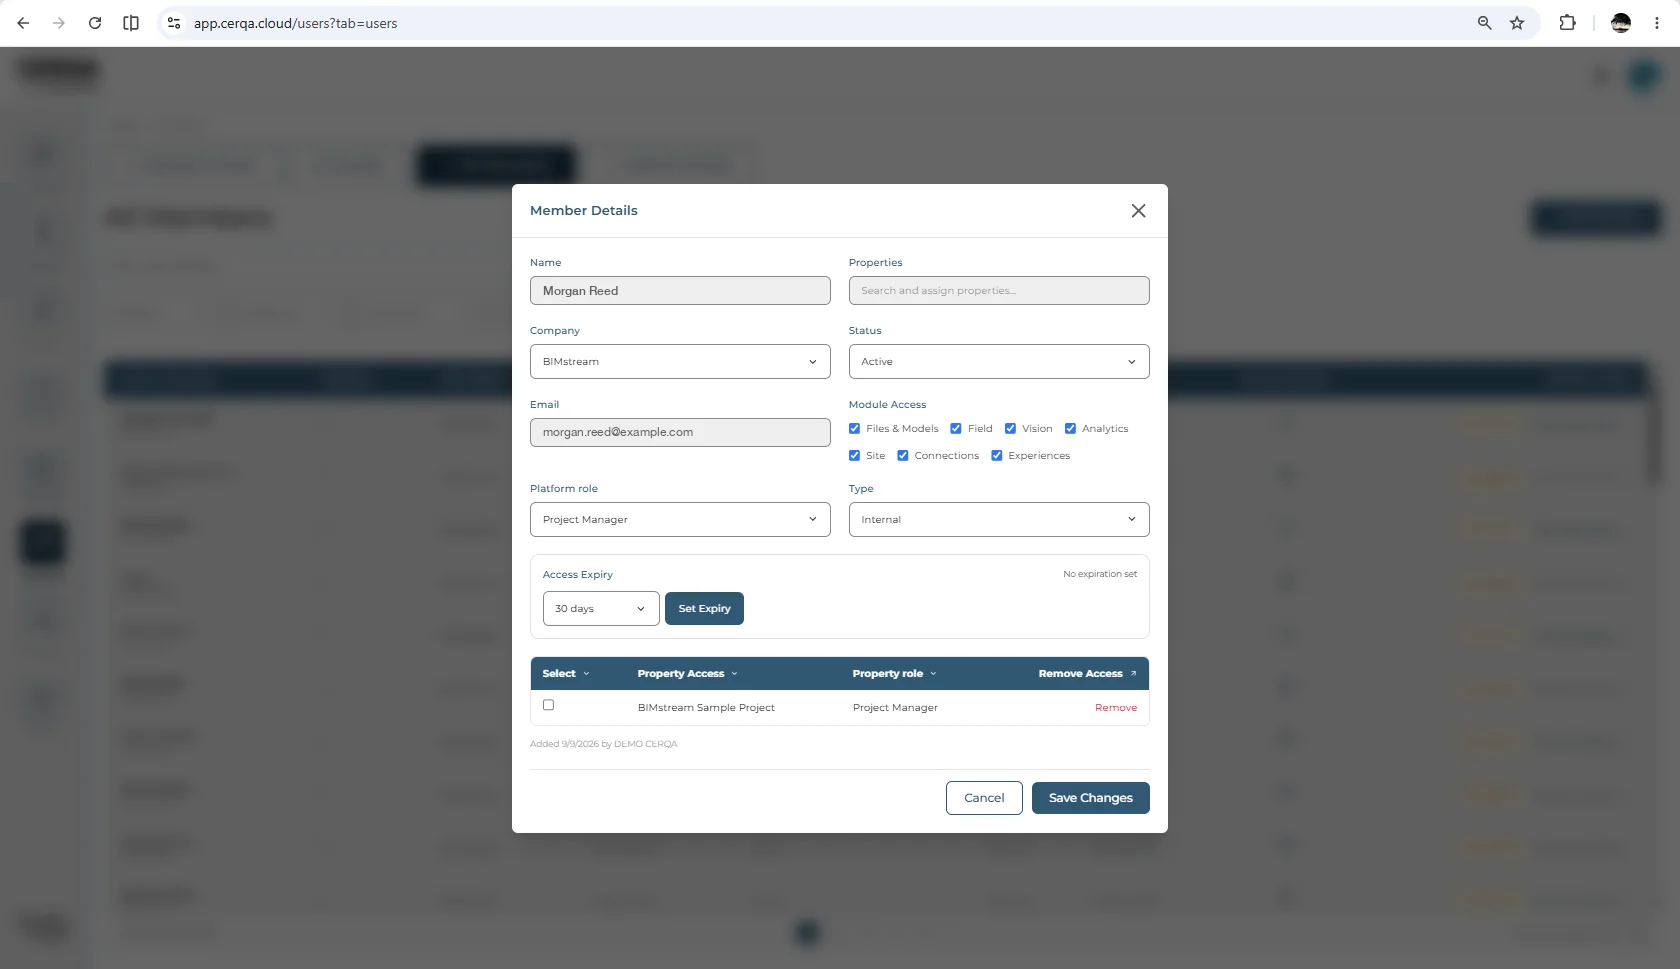
Uncheck a module to revoke this member's company-wide access; re-check to restore. The change applies on save. This is Layer 2 of the three-layer access model from CA-01. For what each module gates at company and property level, see CA-07 - Module gating reference.
Setting Access Expiry
Access Expiry puts a time limit on a member's access to a property. On the expiry date, the member's access to that property is suspended automatically. That is useful for temp contractors and visiting consultants whose access should end without manual deactivation.
The control appears on three surfaces, each used in a different context, and it is not the same control on each.
- 1Member Details modal, company level (editing an EXISTING member) - Reached from Members in the sidebar, then Member Details on a member row. Access Expiry here is a duration dropdown with three options: 30 days, 90 days and 365 days. Pick a duration and click Extend Access. The resulting date shows beside it as a read-only badge, for example Expires Oct 9, 2026. There is no date field and no calendar on this surface.
- 2Add Member dialog (adding a NEW member to a property) - The dialog shows an Access Duration preset picker. Six chips: 30 days (default), 90 days, 180 days, 1 year, Custom, No expiry. Helper text: “Access will automatically expire after this period. Admins can extend later.” Pick a chip on member add; the expiry date is computed from the preset.
- 3Property Members, property level (editing a member on one property) - Open a property, go to its Property Members tab, and edit a member from there. This is the surface that carries a calendar date picker for setting an exact date. It is the only one of the three that does.
Who can set Access Expiry
Access Expiry is gated to Project Admin and above. A Project Manager or Contributor cannot set it. See F-04 - Roles and permissions for the full capability matrix.
Deactivating vs deleting
Two distinct actions on a member record. Both are available to a Company Admin acting in their own company against a lower-role member. This is the complete rule, matching F-04: a Company Admin can permanently delete members below their own role, within their own company.
Choosing between deactivation and deletion
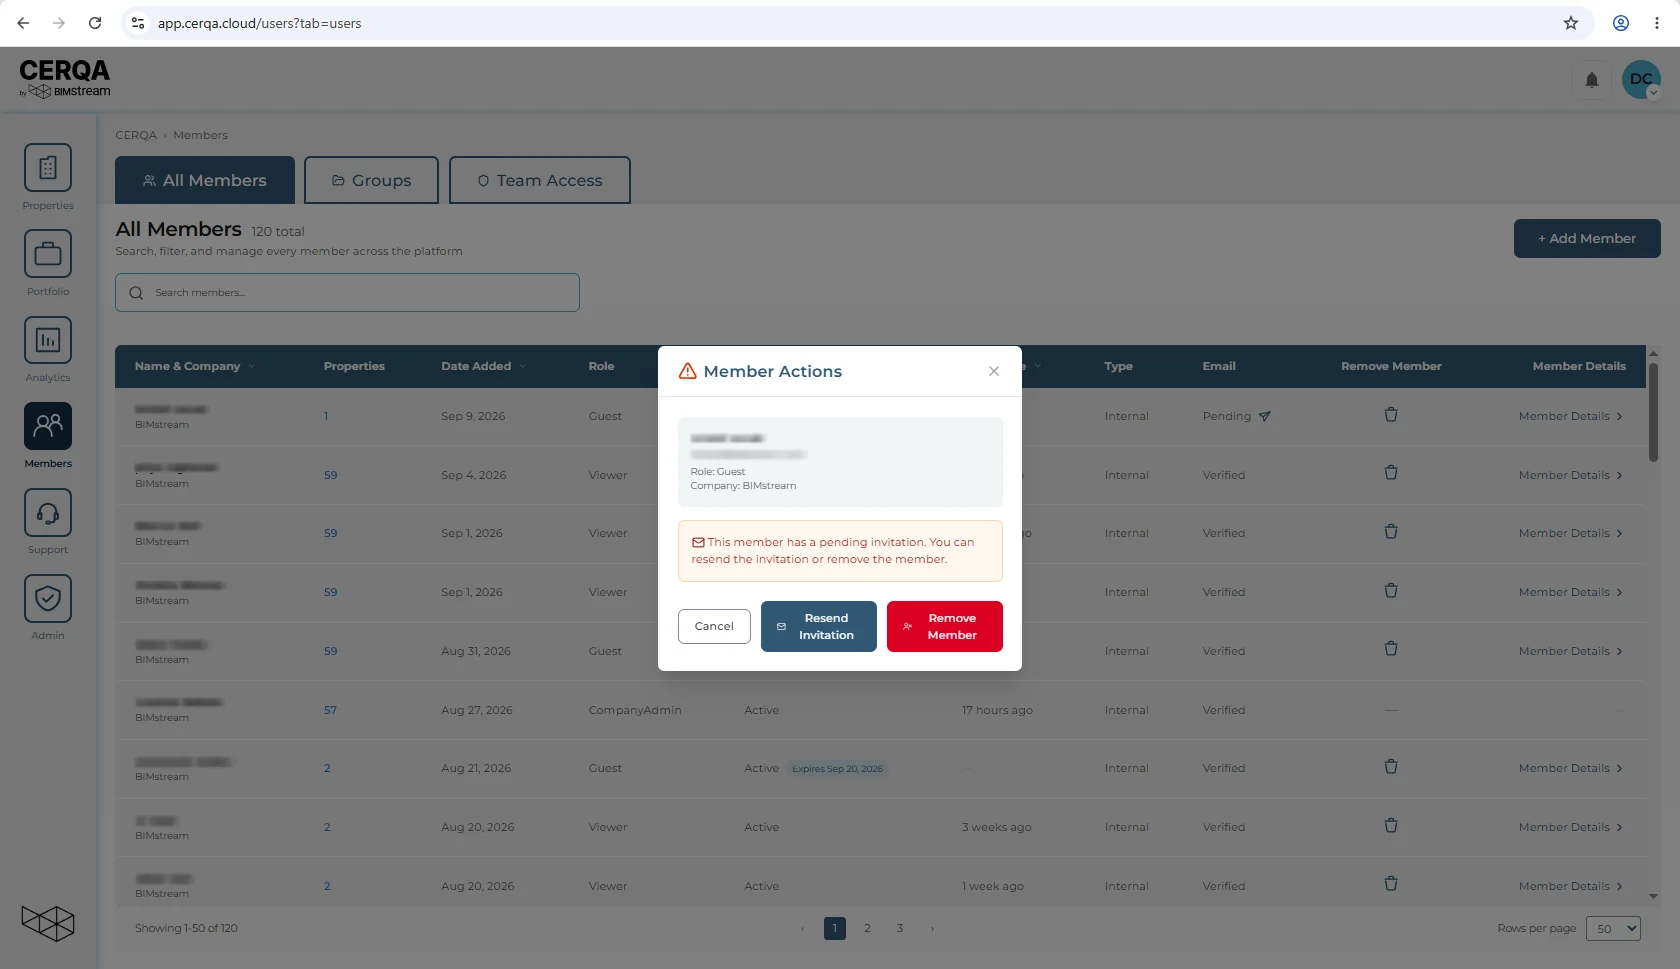
Deactivation suspends the member's access while retaining the member record, their authorship history, and their audit trail. The member can no longer sign in; their past actions remain attached to their record and visible to other admins. Choose this when access should end but history should remain.
Deletion is a hard delete. The member record is removed. Choose this when the record itself should not persist (a test account, an accidental invite, a duplicate).
When to escalate to your CERQA Account Manager
Three deletion scenarios are beyond Company Admin scope and require escalation:
- Cross-company members (a member who belongs to a different company you share access with).
- CA-or-above members (you cannot delete another Company Admin or above).
- Undoing a deletion (there is no self-serve restore for a deleted member record).
For these, escalate via CA-14 - When to call your CERQA Account Manager.
Per-property team management
CERQA has two team-management scopes, and it matters which one you're in.
- Company-level (Team page in the CA sidebar). Only a Company Admin can invite new members into the company. This is the CA-04 flow.
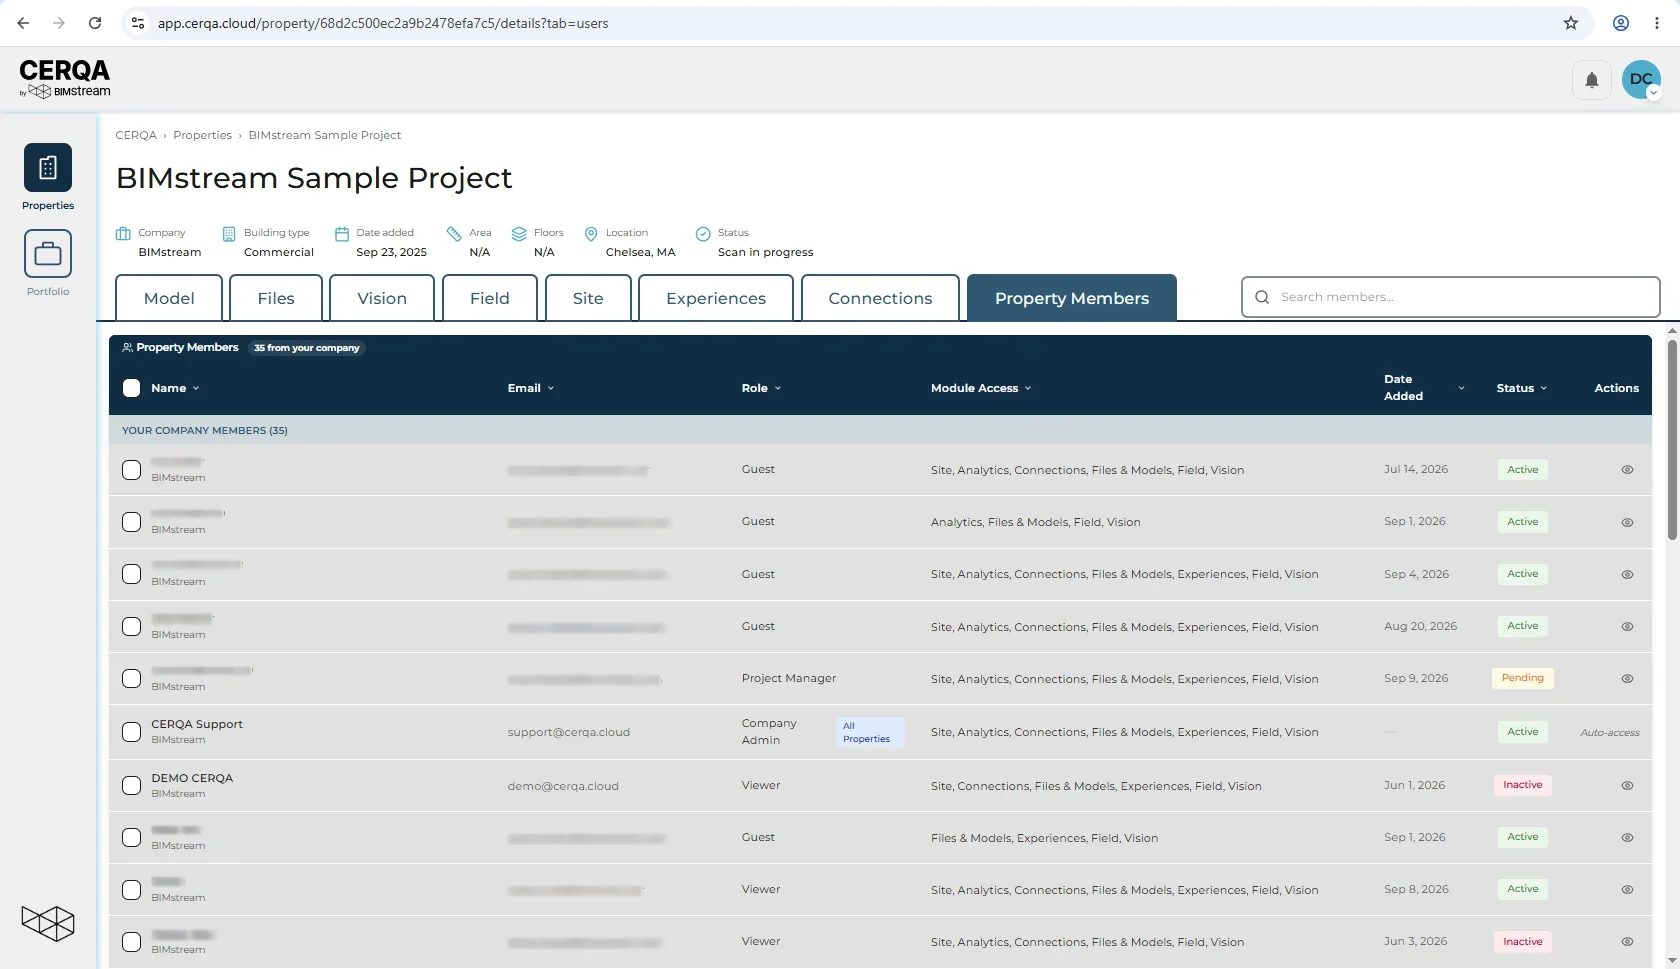
- Property-level (a property's Property Members tab). Project Admin scope. PA can add members to that specific property, edit their property-level role and module access, set their access expiry, and remove them.
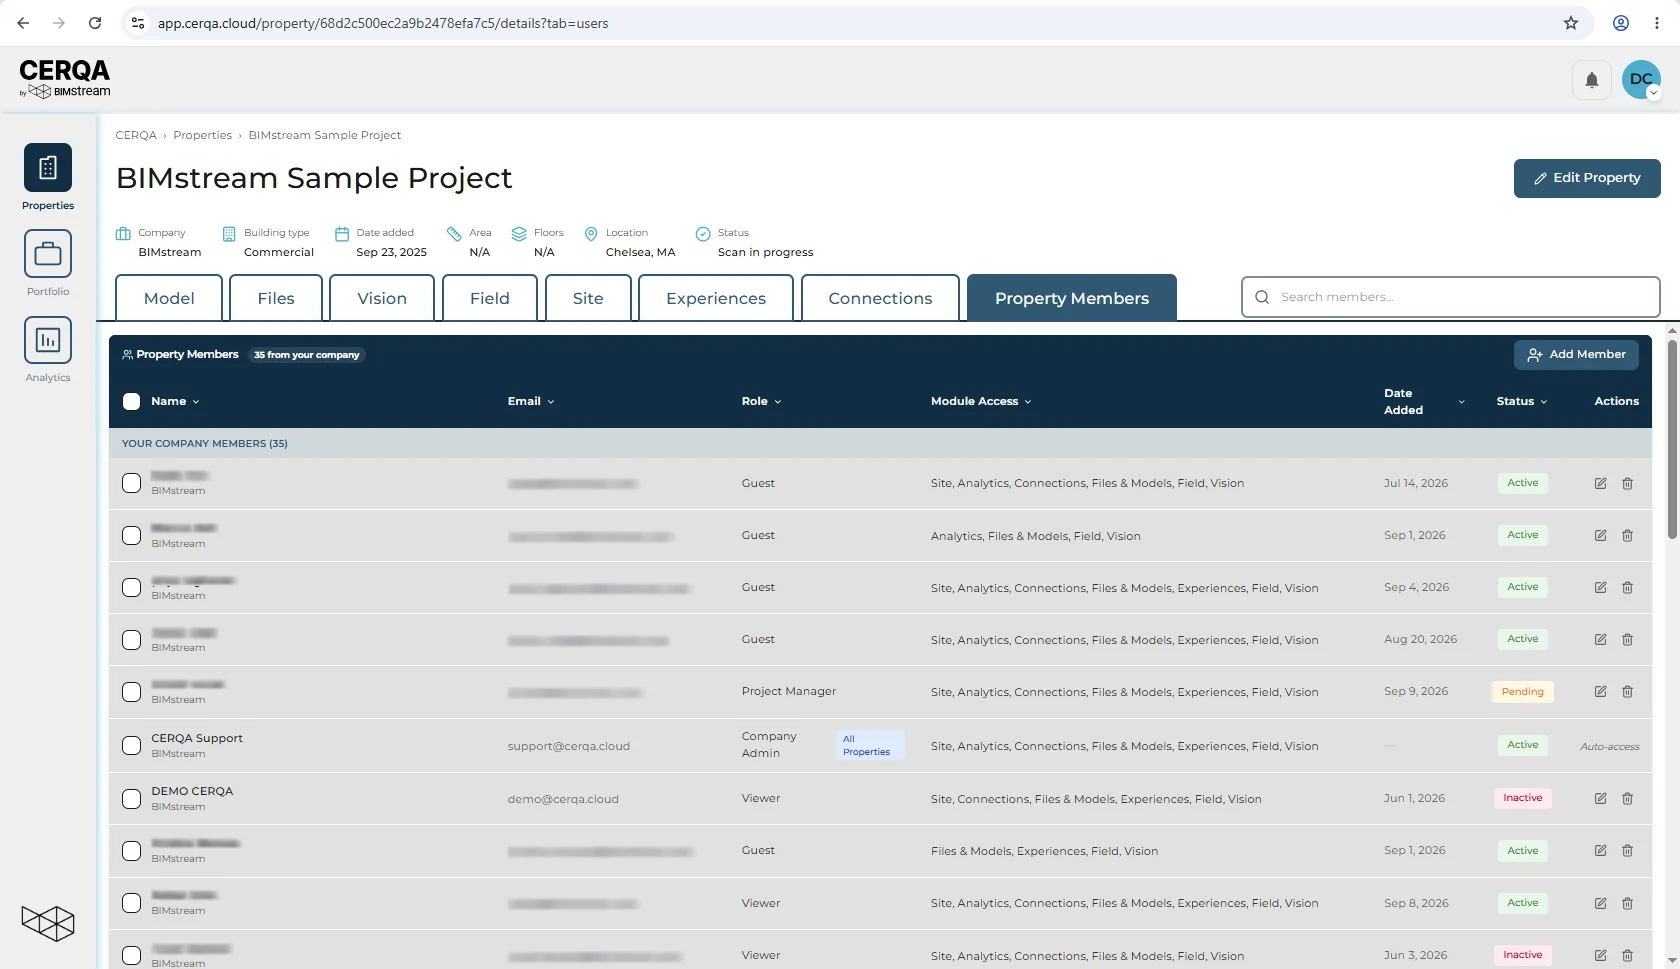
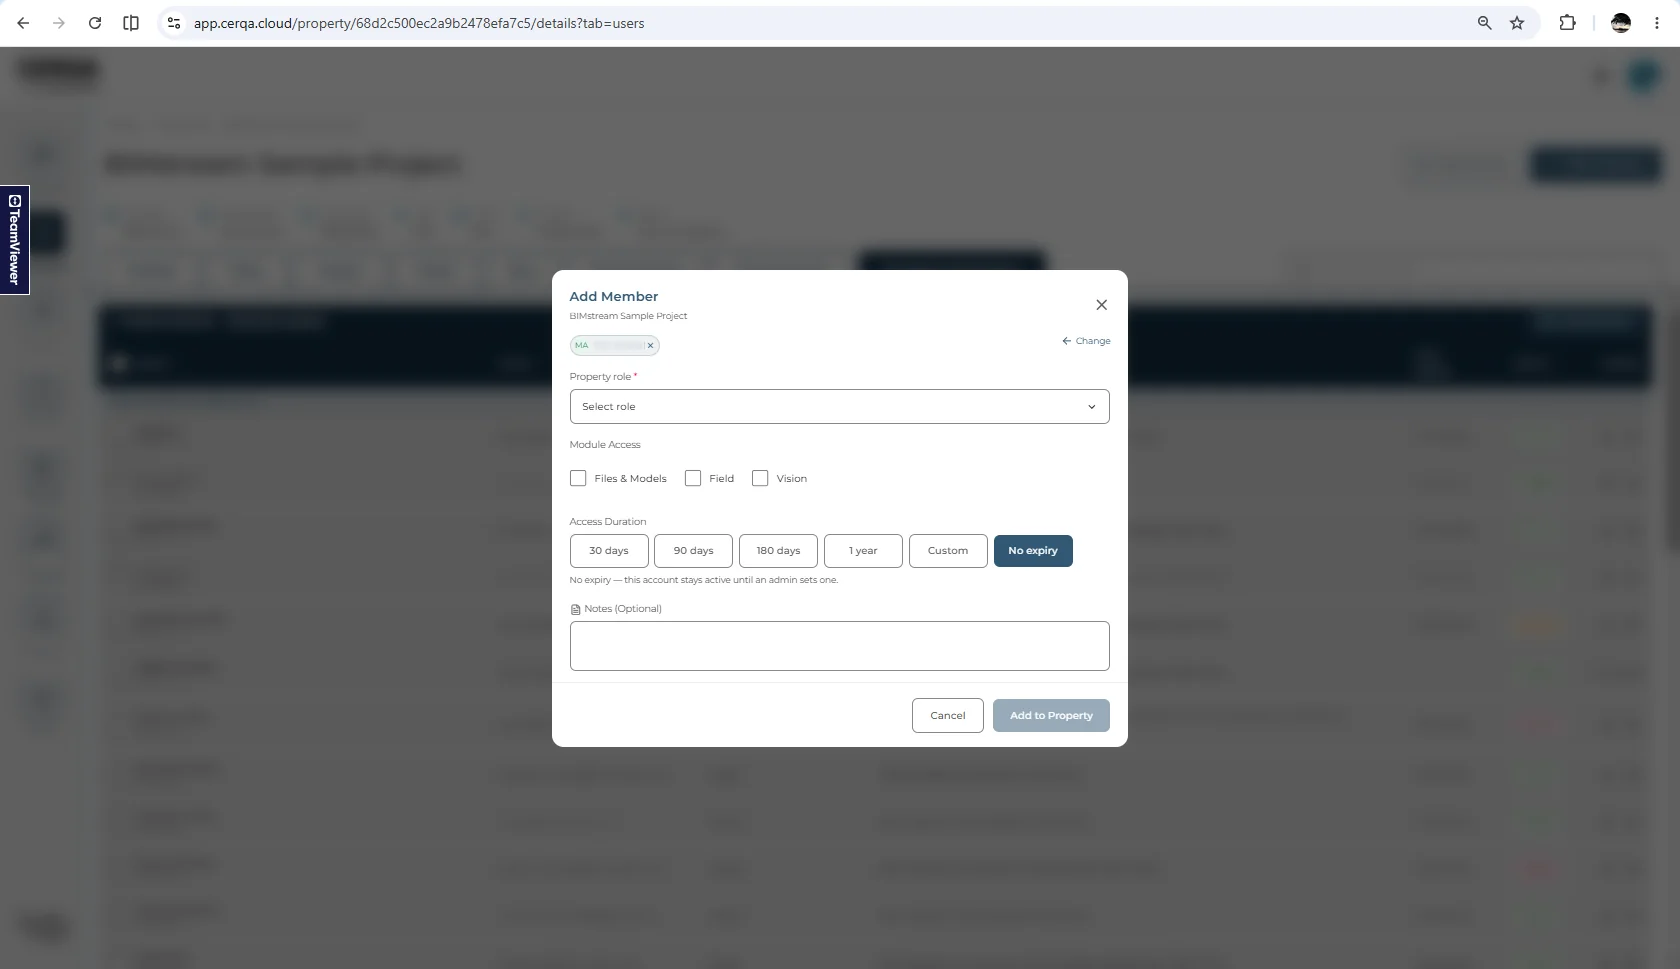
Click Add Member to open the Add Member dialog (the dialog title is also “Add Member”).
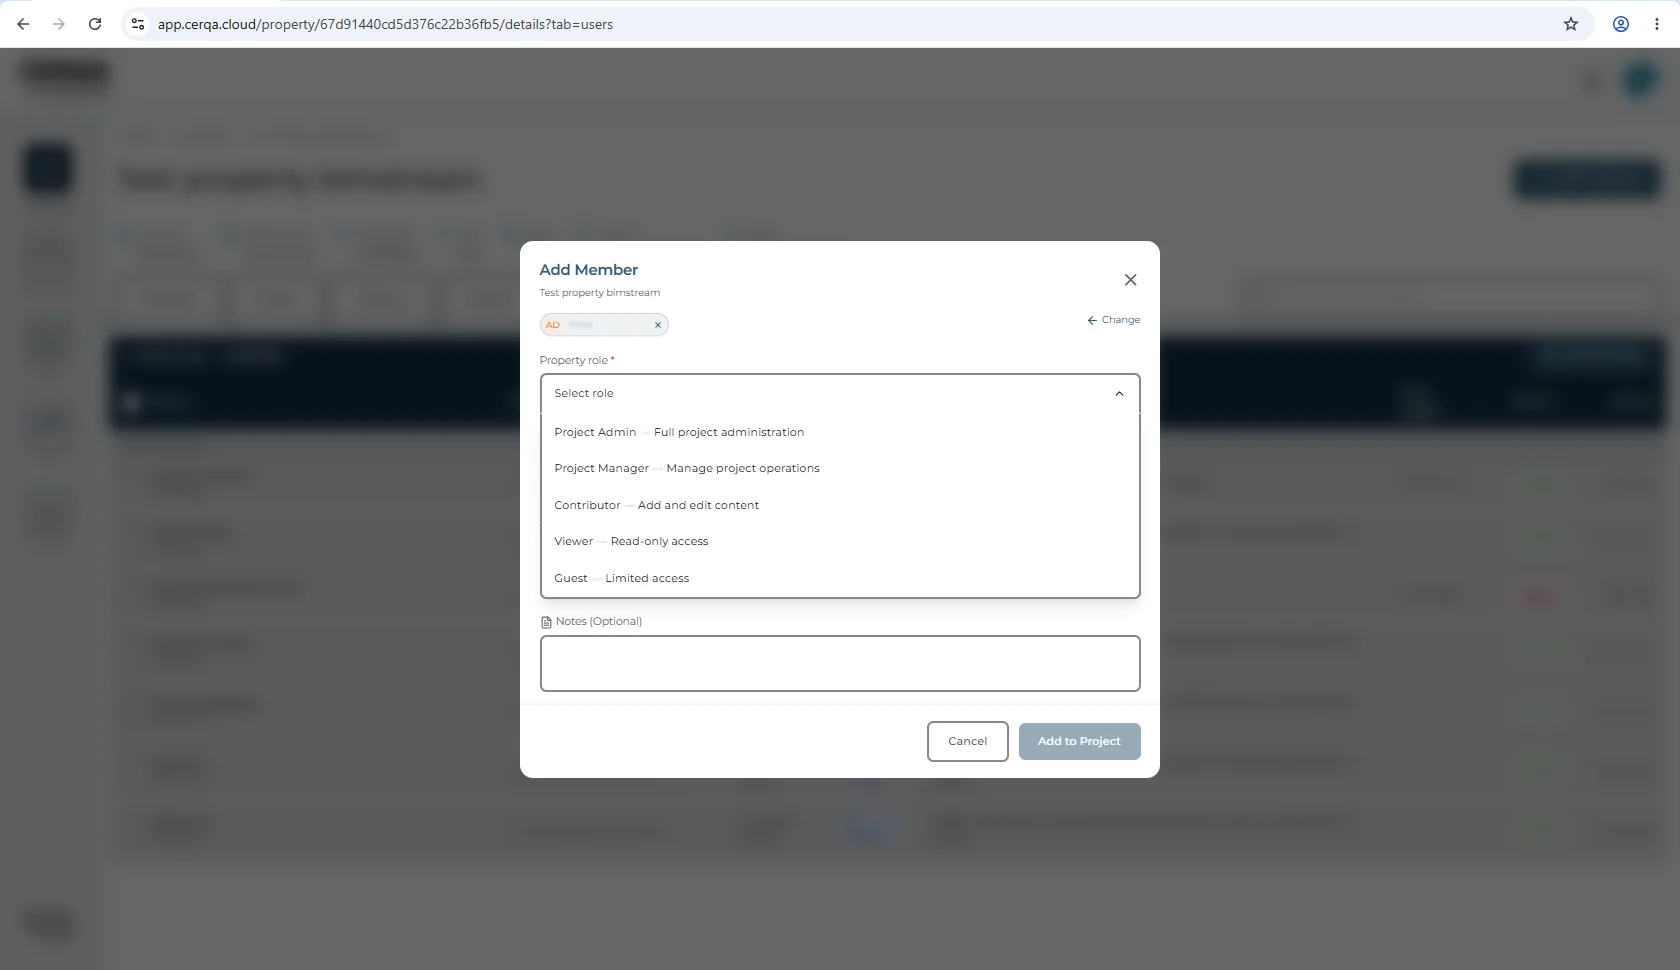
The dialog has five fields:
- Select Member: a search dropdown of existing company members. If you type an unmatched email address, the dialog surfaces an invite CTA, so this dialog can also bring a new member into the company and onto the property in a single action.
- Property Role: five options to a Company Admin (the five labels above). A Project Admin actor sees only four options; the Project Admin option is omitted because PA cannot assign at their own level.
- Module Access: three checkboxes, Files & Models, Field, and Vision. This module section is shown only to Company Admins; a Project Admin opening the dialog does not see it. Other modules (Site, Connections, Analytics) are governed by the member's company-level access and do not appear here; the Sustainability section inside Connections follows the Connections tab's access.
- Access Duration: an Access Duration preset picker with six chips: 30 days (default), 90 days, 180 days, 1 year, Custom, No expiry. Helper text under the chips reads “Access will automatically expire after this period. Admins can extend later.” This is a different UI from the Member Details modal's Access Expiry duration dropdown (see §Setting Access Expiry for all three surfaces: Add Member uses these chips; Member Details uses a duration dropdown; the property-level Property Members edit uses a calendar picker).
- Notes: optional, 500-character limit. Shown only when adding a single member at a time.
Who can manage what
The short answer: three roles manage teams, and they do different things.
- Company Admin (sidebar Team page): manages all members company-wide. Only a Company Admin can invite new members into the company at the company level, and can deactivate or delete lower-role members in their own company.
- Project Admin (a property's Property Members tab): manages that property's team. Can use the Add Member dialog to invite existing company members or brand-new members (via the unmatched-email invite CTA) into that property, and to set their property-level role and access expiry.
- Project Manager: view-only on a property's Property Members tab. The member list is visible to a Project Manager, but the Add Member button is not. Project Managers cannot add, edit, or remove members at any level. “Member management” appears in informal role descriptions; in CERQA it is not a PM capability.
For the full role-by-role matrix, see F-04 - Roles and permissions. For what a Project Manager can actually do on a property they have been added to, see PM-01 - What a Project Manager does in CERQA.
Sustainability data (LEED and ENERGY STAR) does not flow through the Property Members tab. It lives on the Connections tab on the property. For that scope, see CA-11 - The Connections tab.